Building a Quarto Website and Using GitHub
2025-07-18
1 - Setup Repository Online
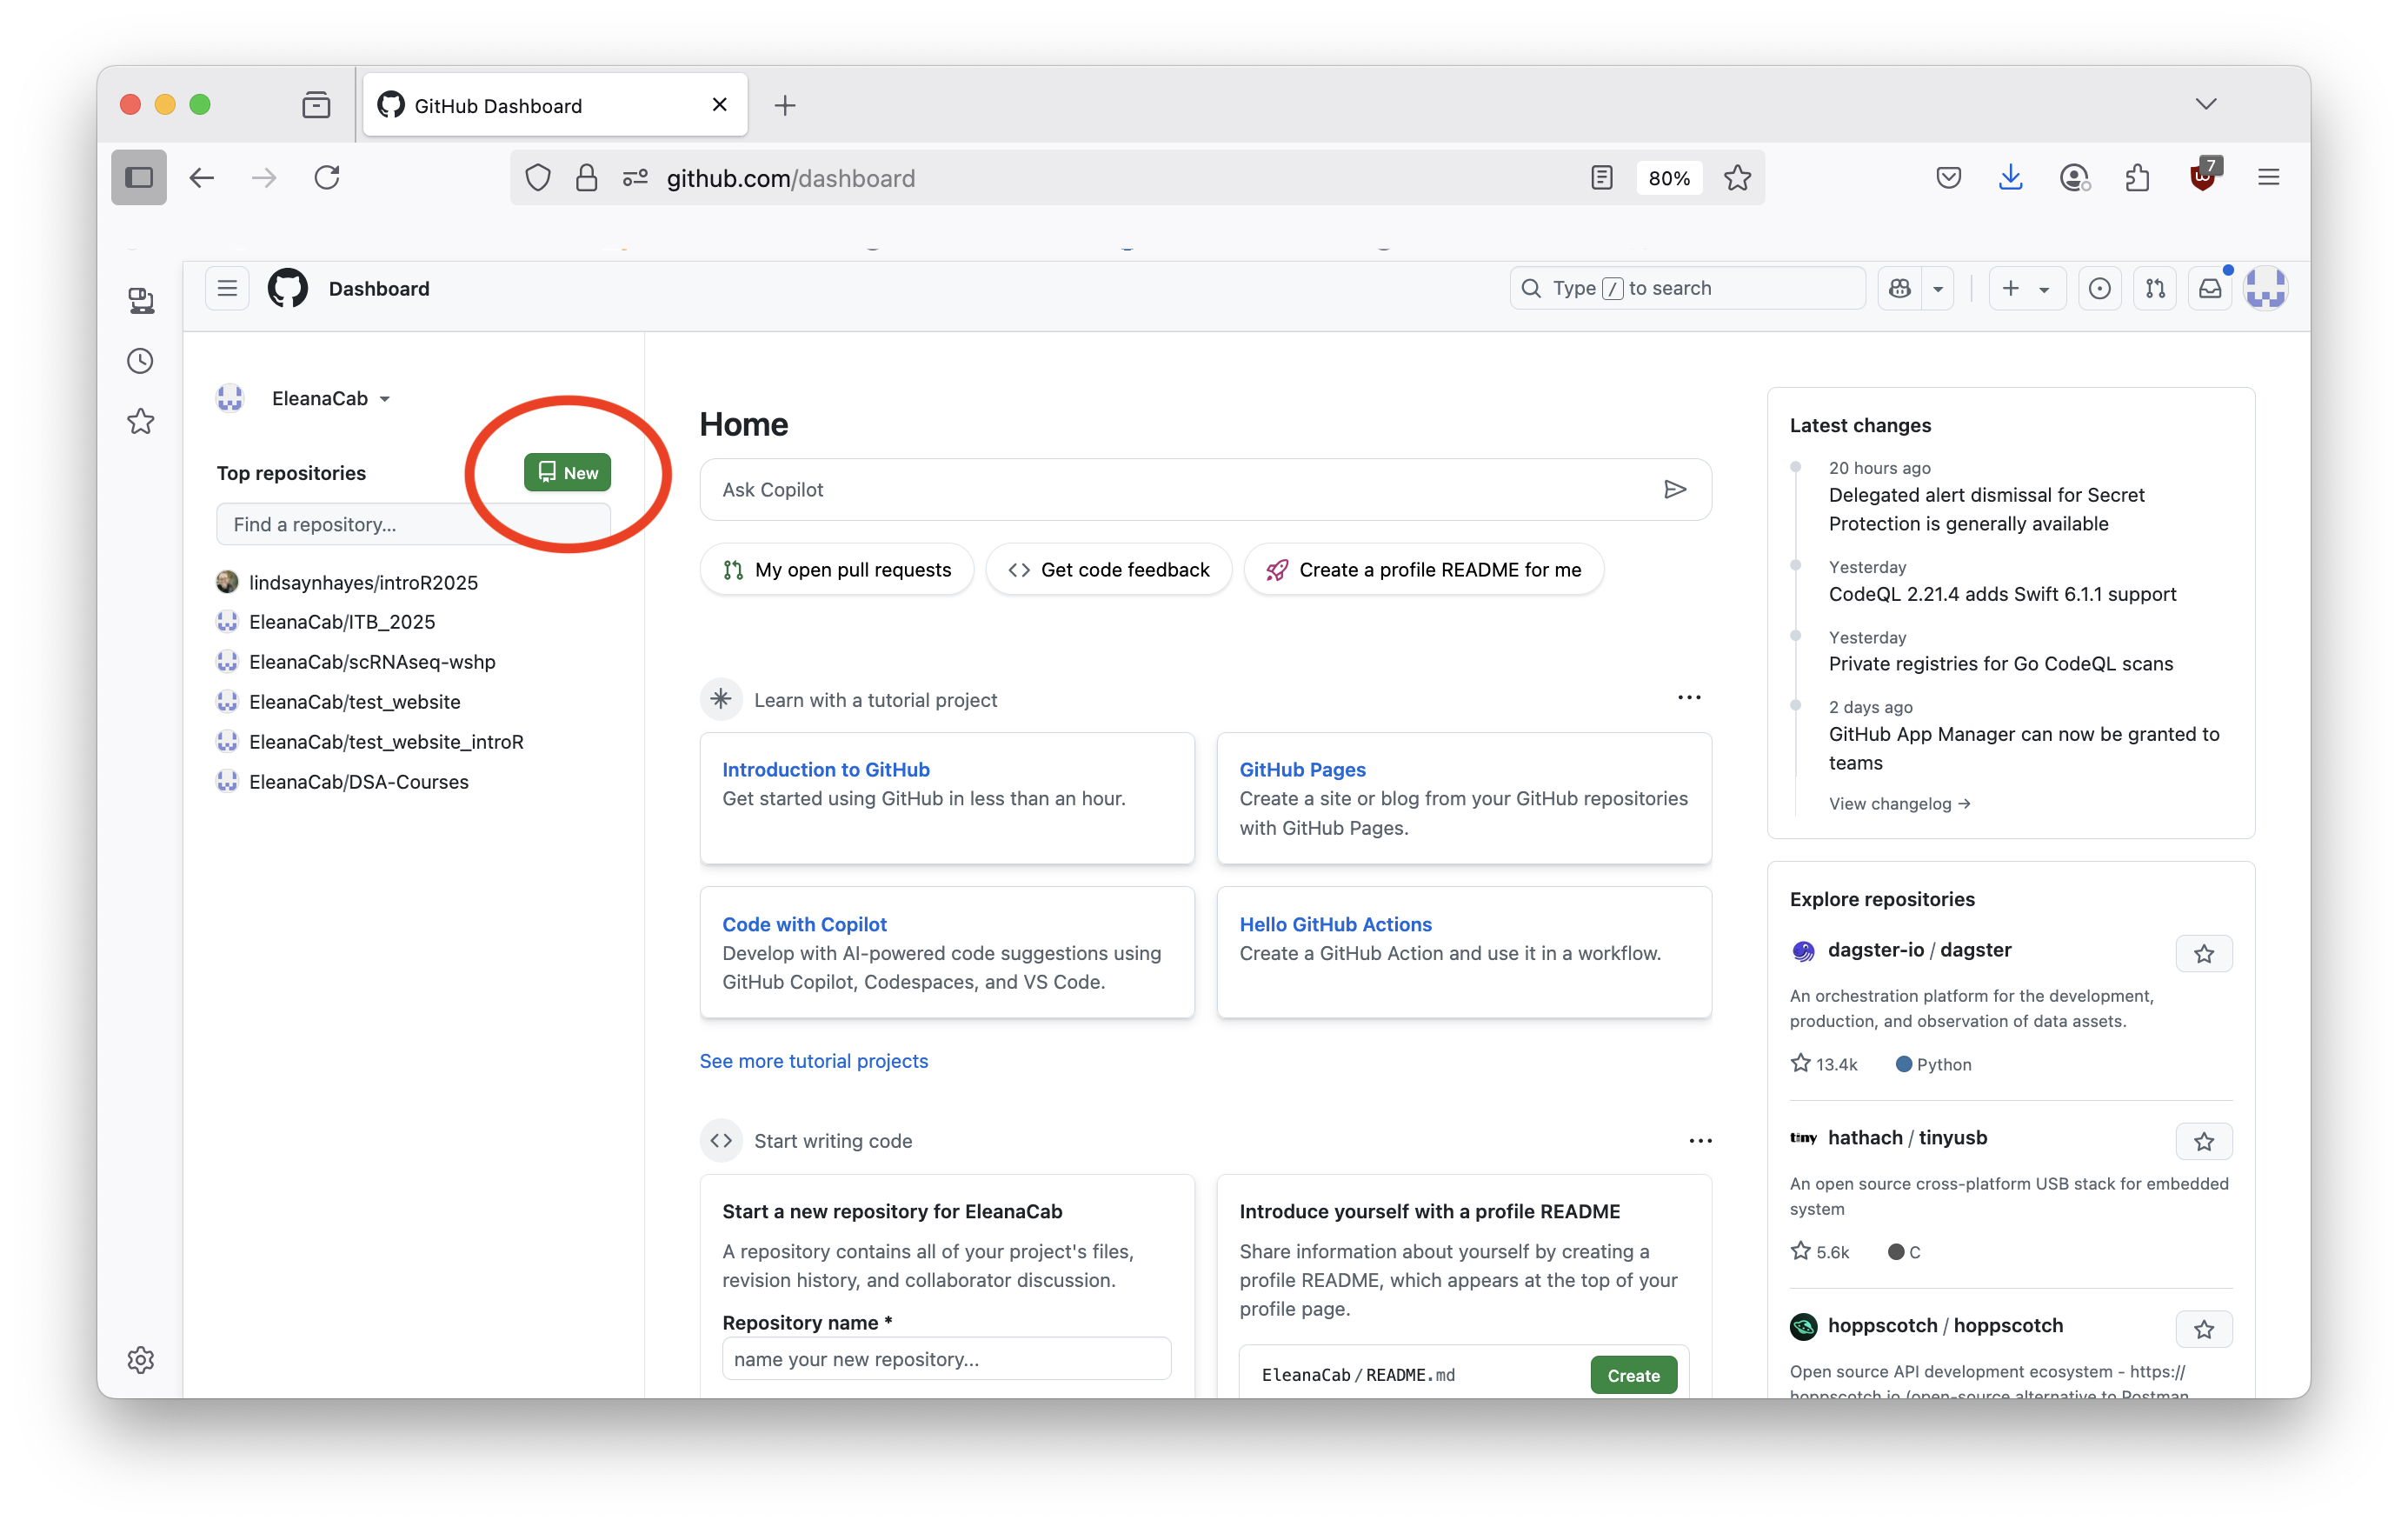
Log in to your GitHub account.
Click on the New Repo button.
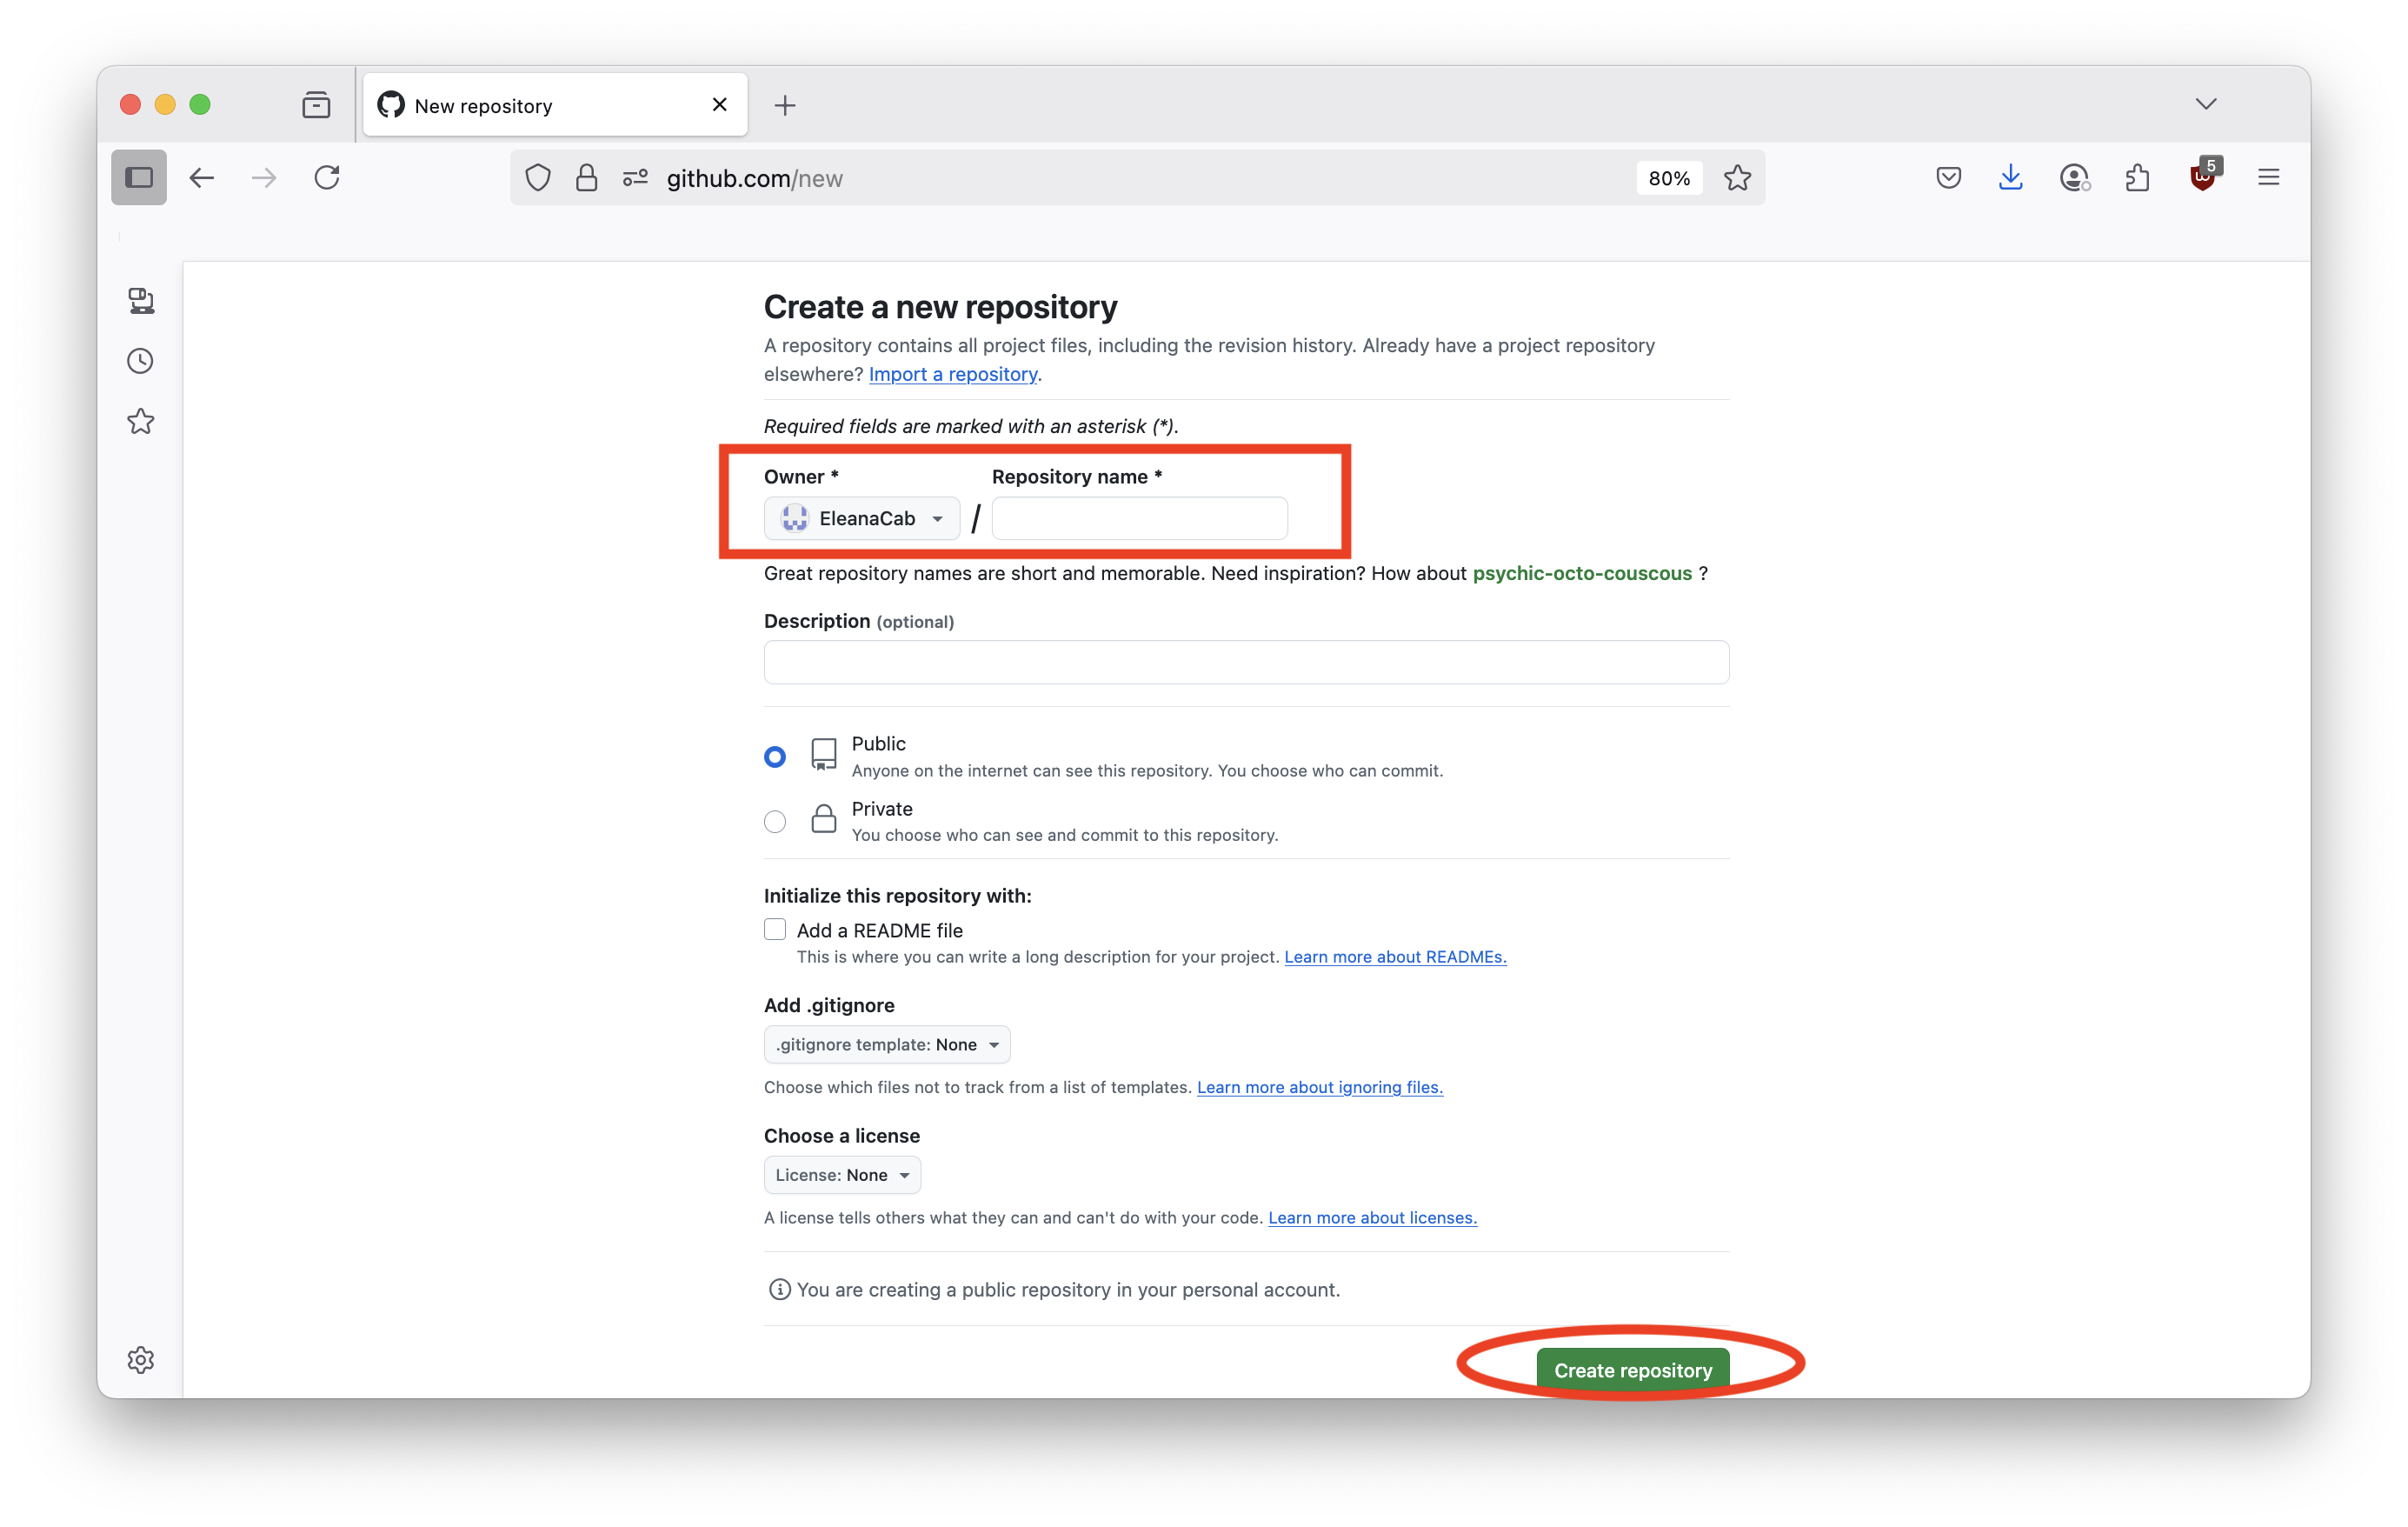
Name your repo with purpose (your name for a personal website, a project name, a course name, etc.)
Click the Create Repository button.
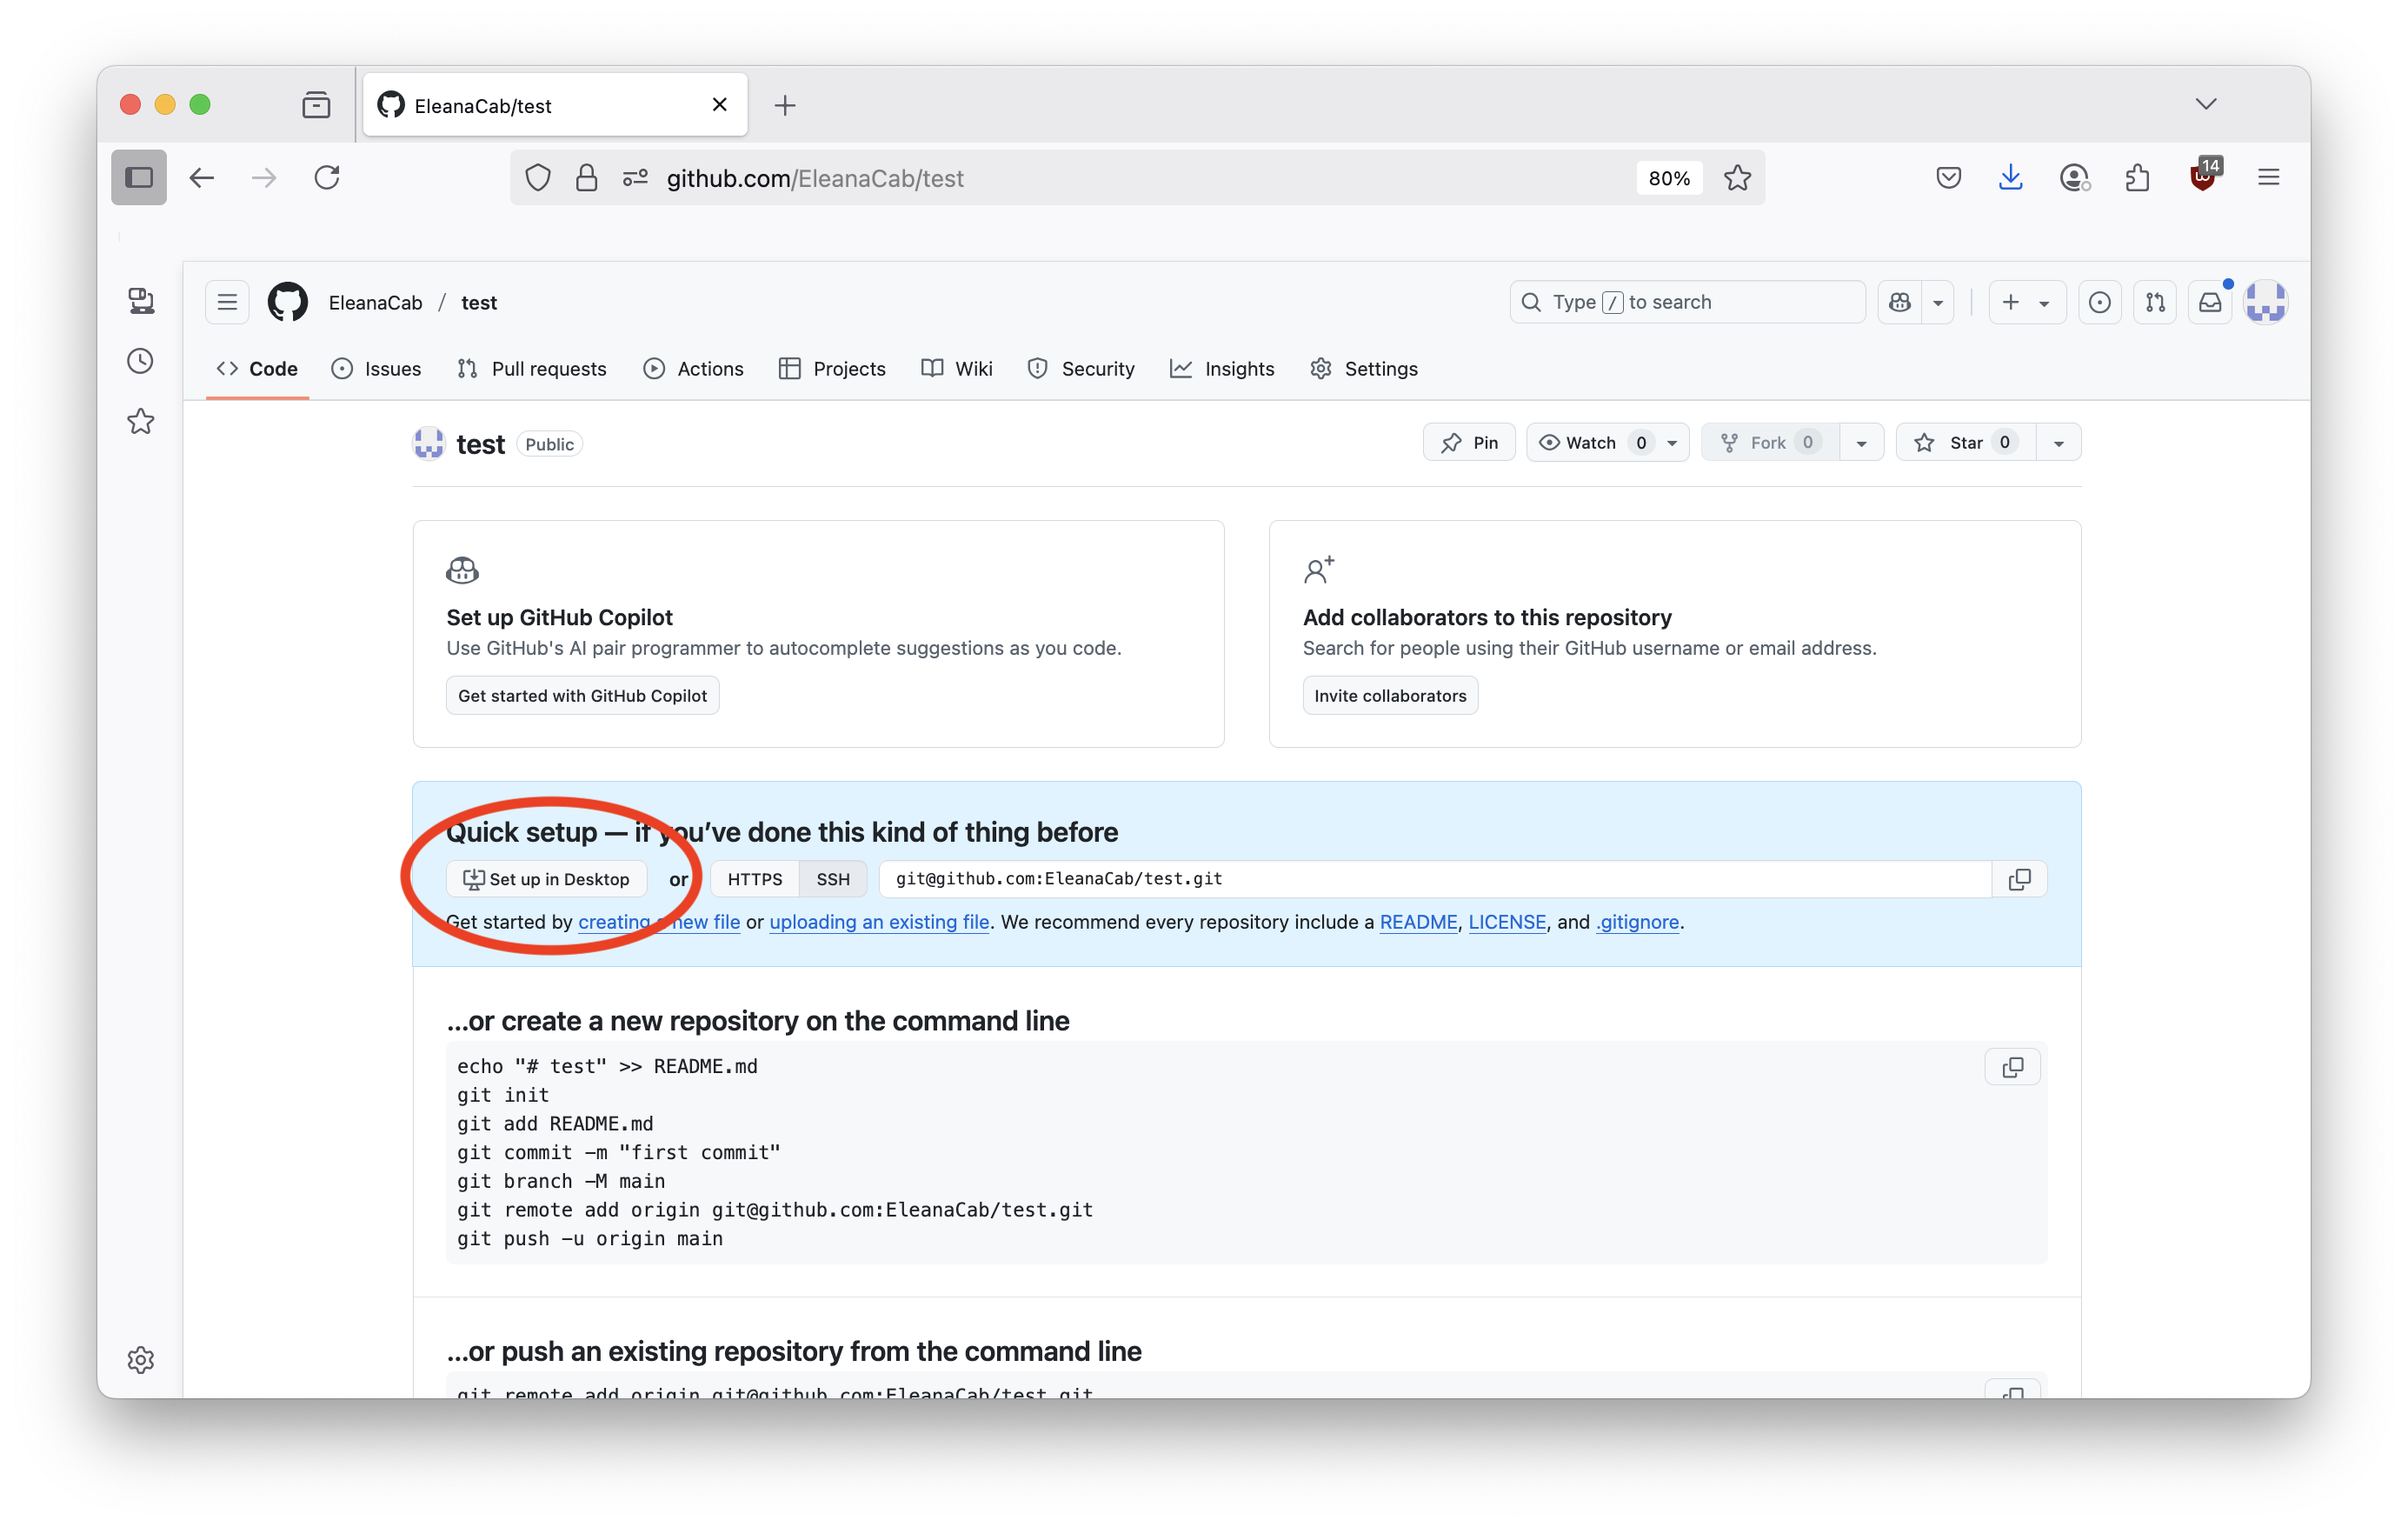
Once on the page below, click Set up in Desktop.
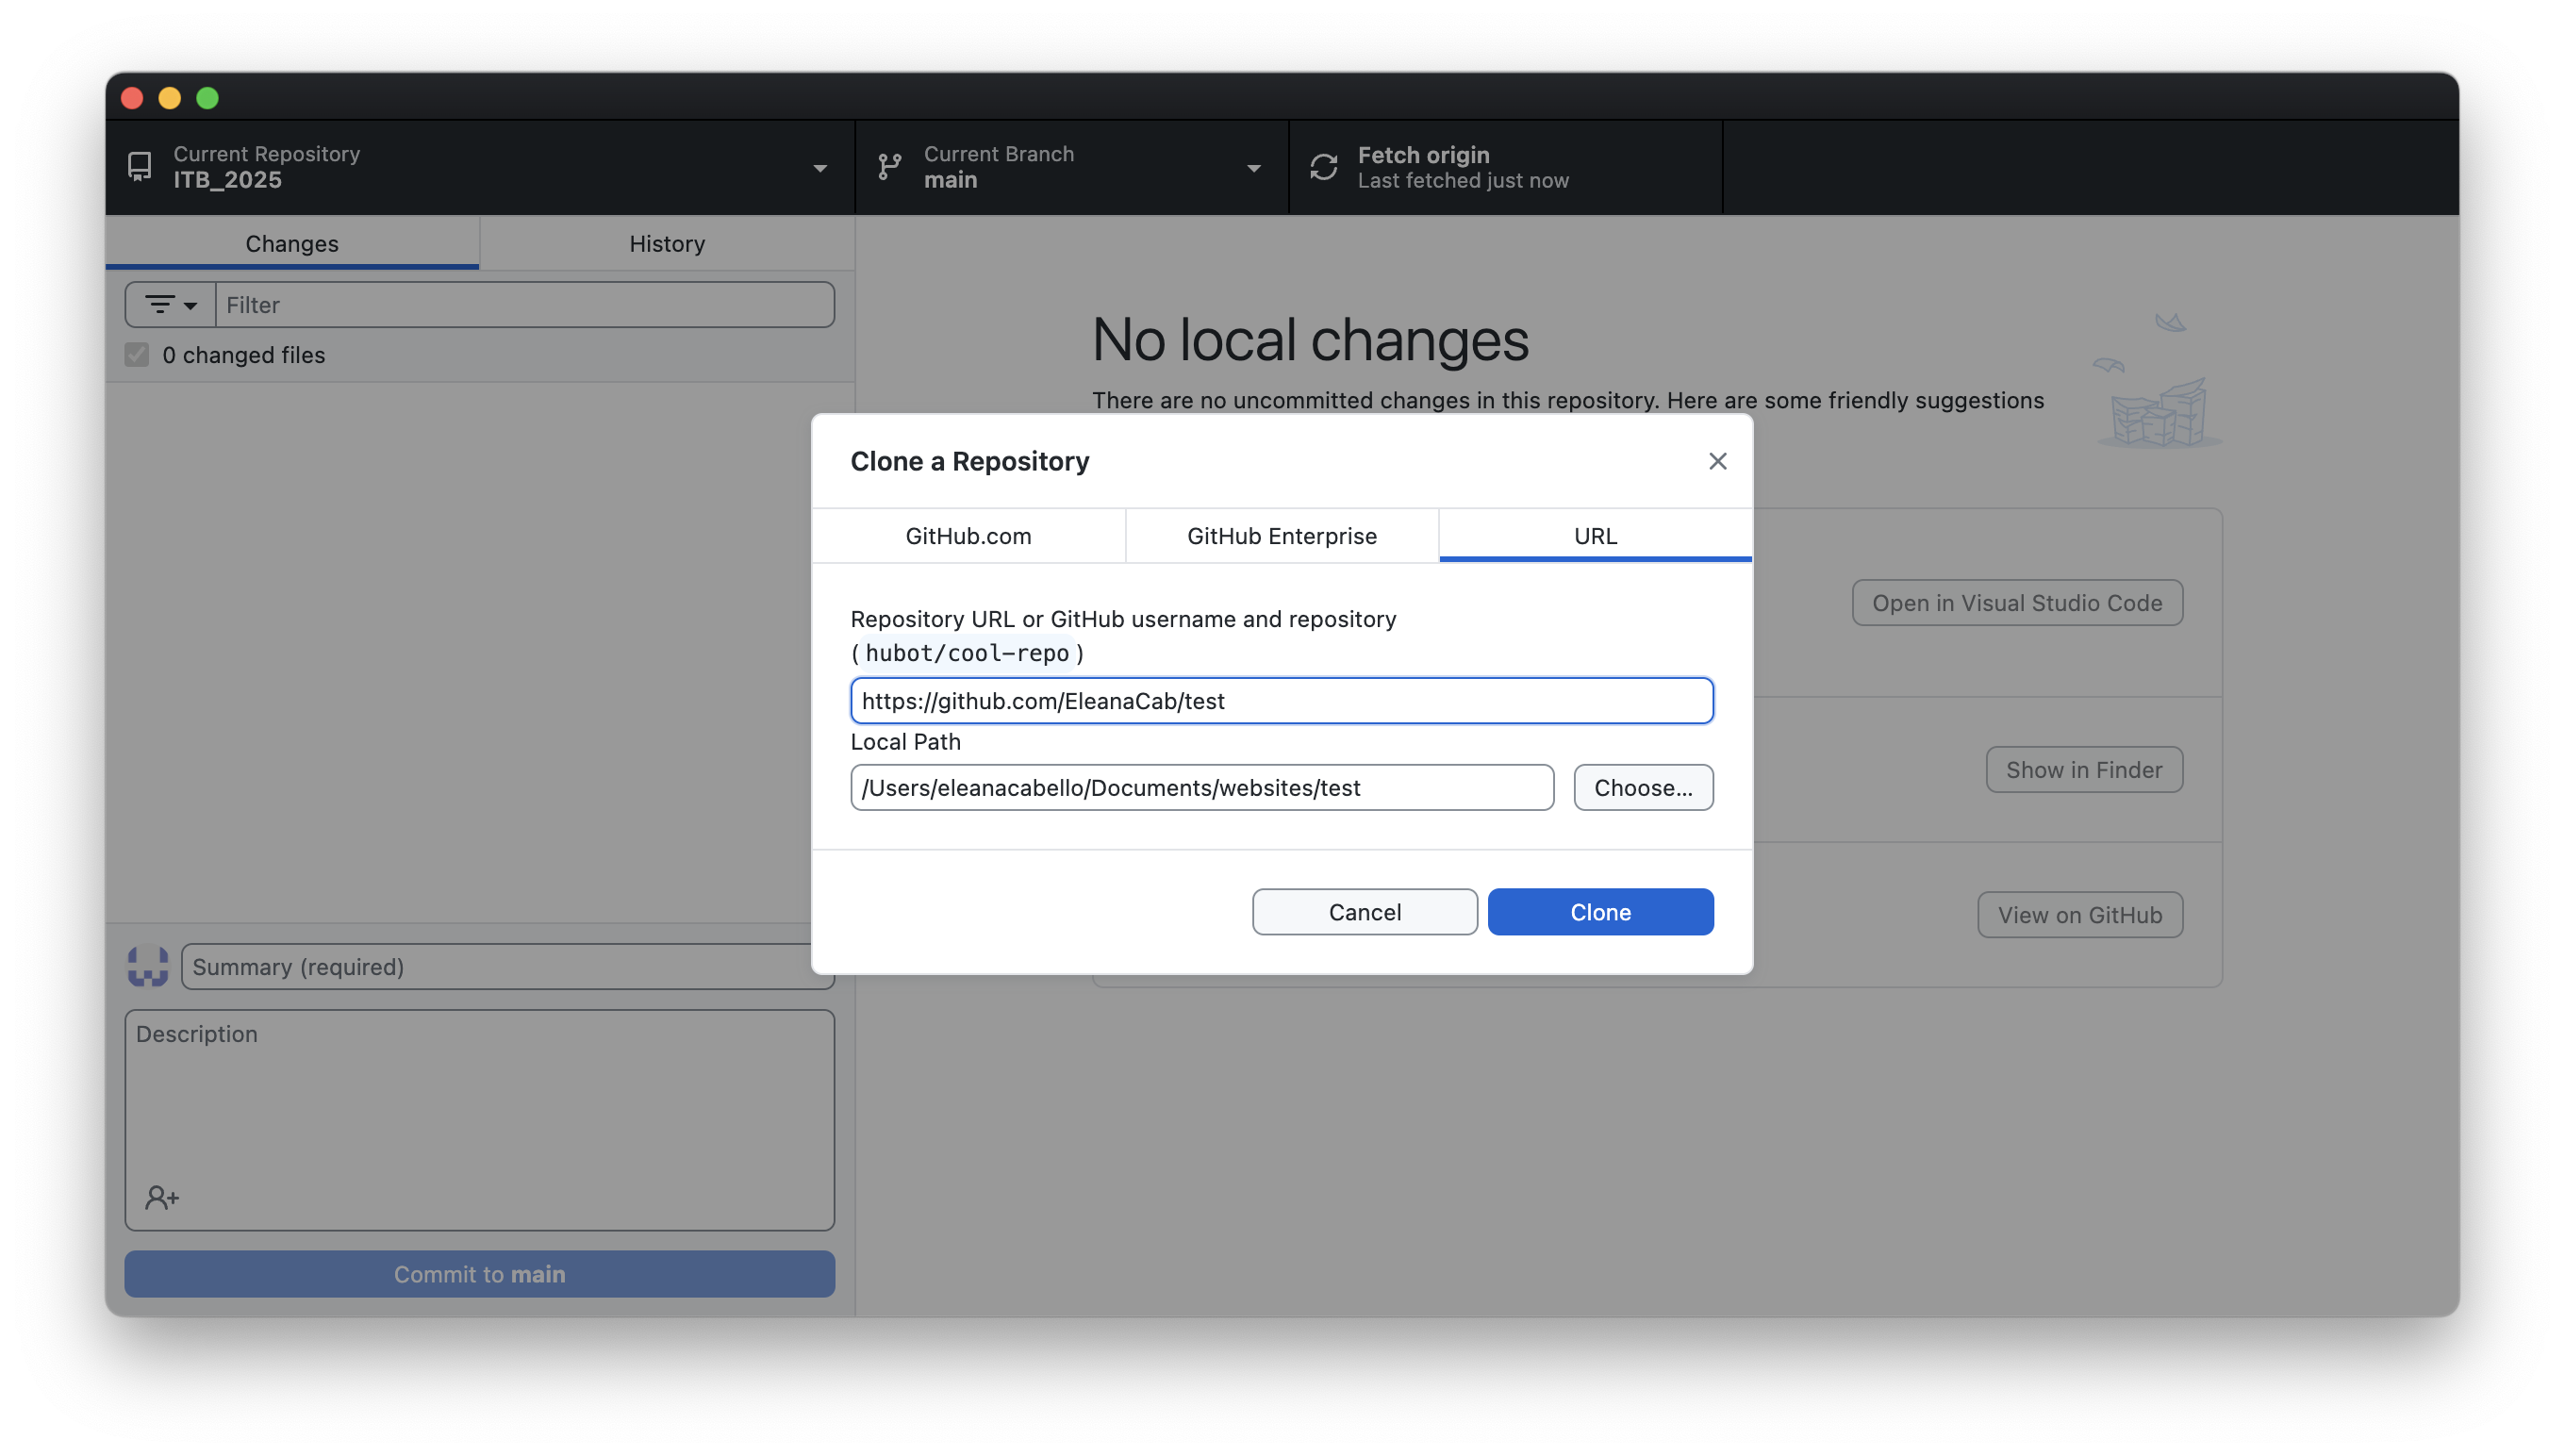
2 - Set Up Remote Repository Locally through Github Desktop
Once in Github Desktop, pick what directory you would like to store the repository locally. This action will create a remote repository connecting it to the one you have online.
Try to keep organized and do this in a directory dedicated to your GitHub projects.
3 - Open RStudio and Set Repository as Working Directory
Navigate to your remote repository through the files window.
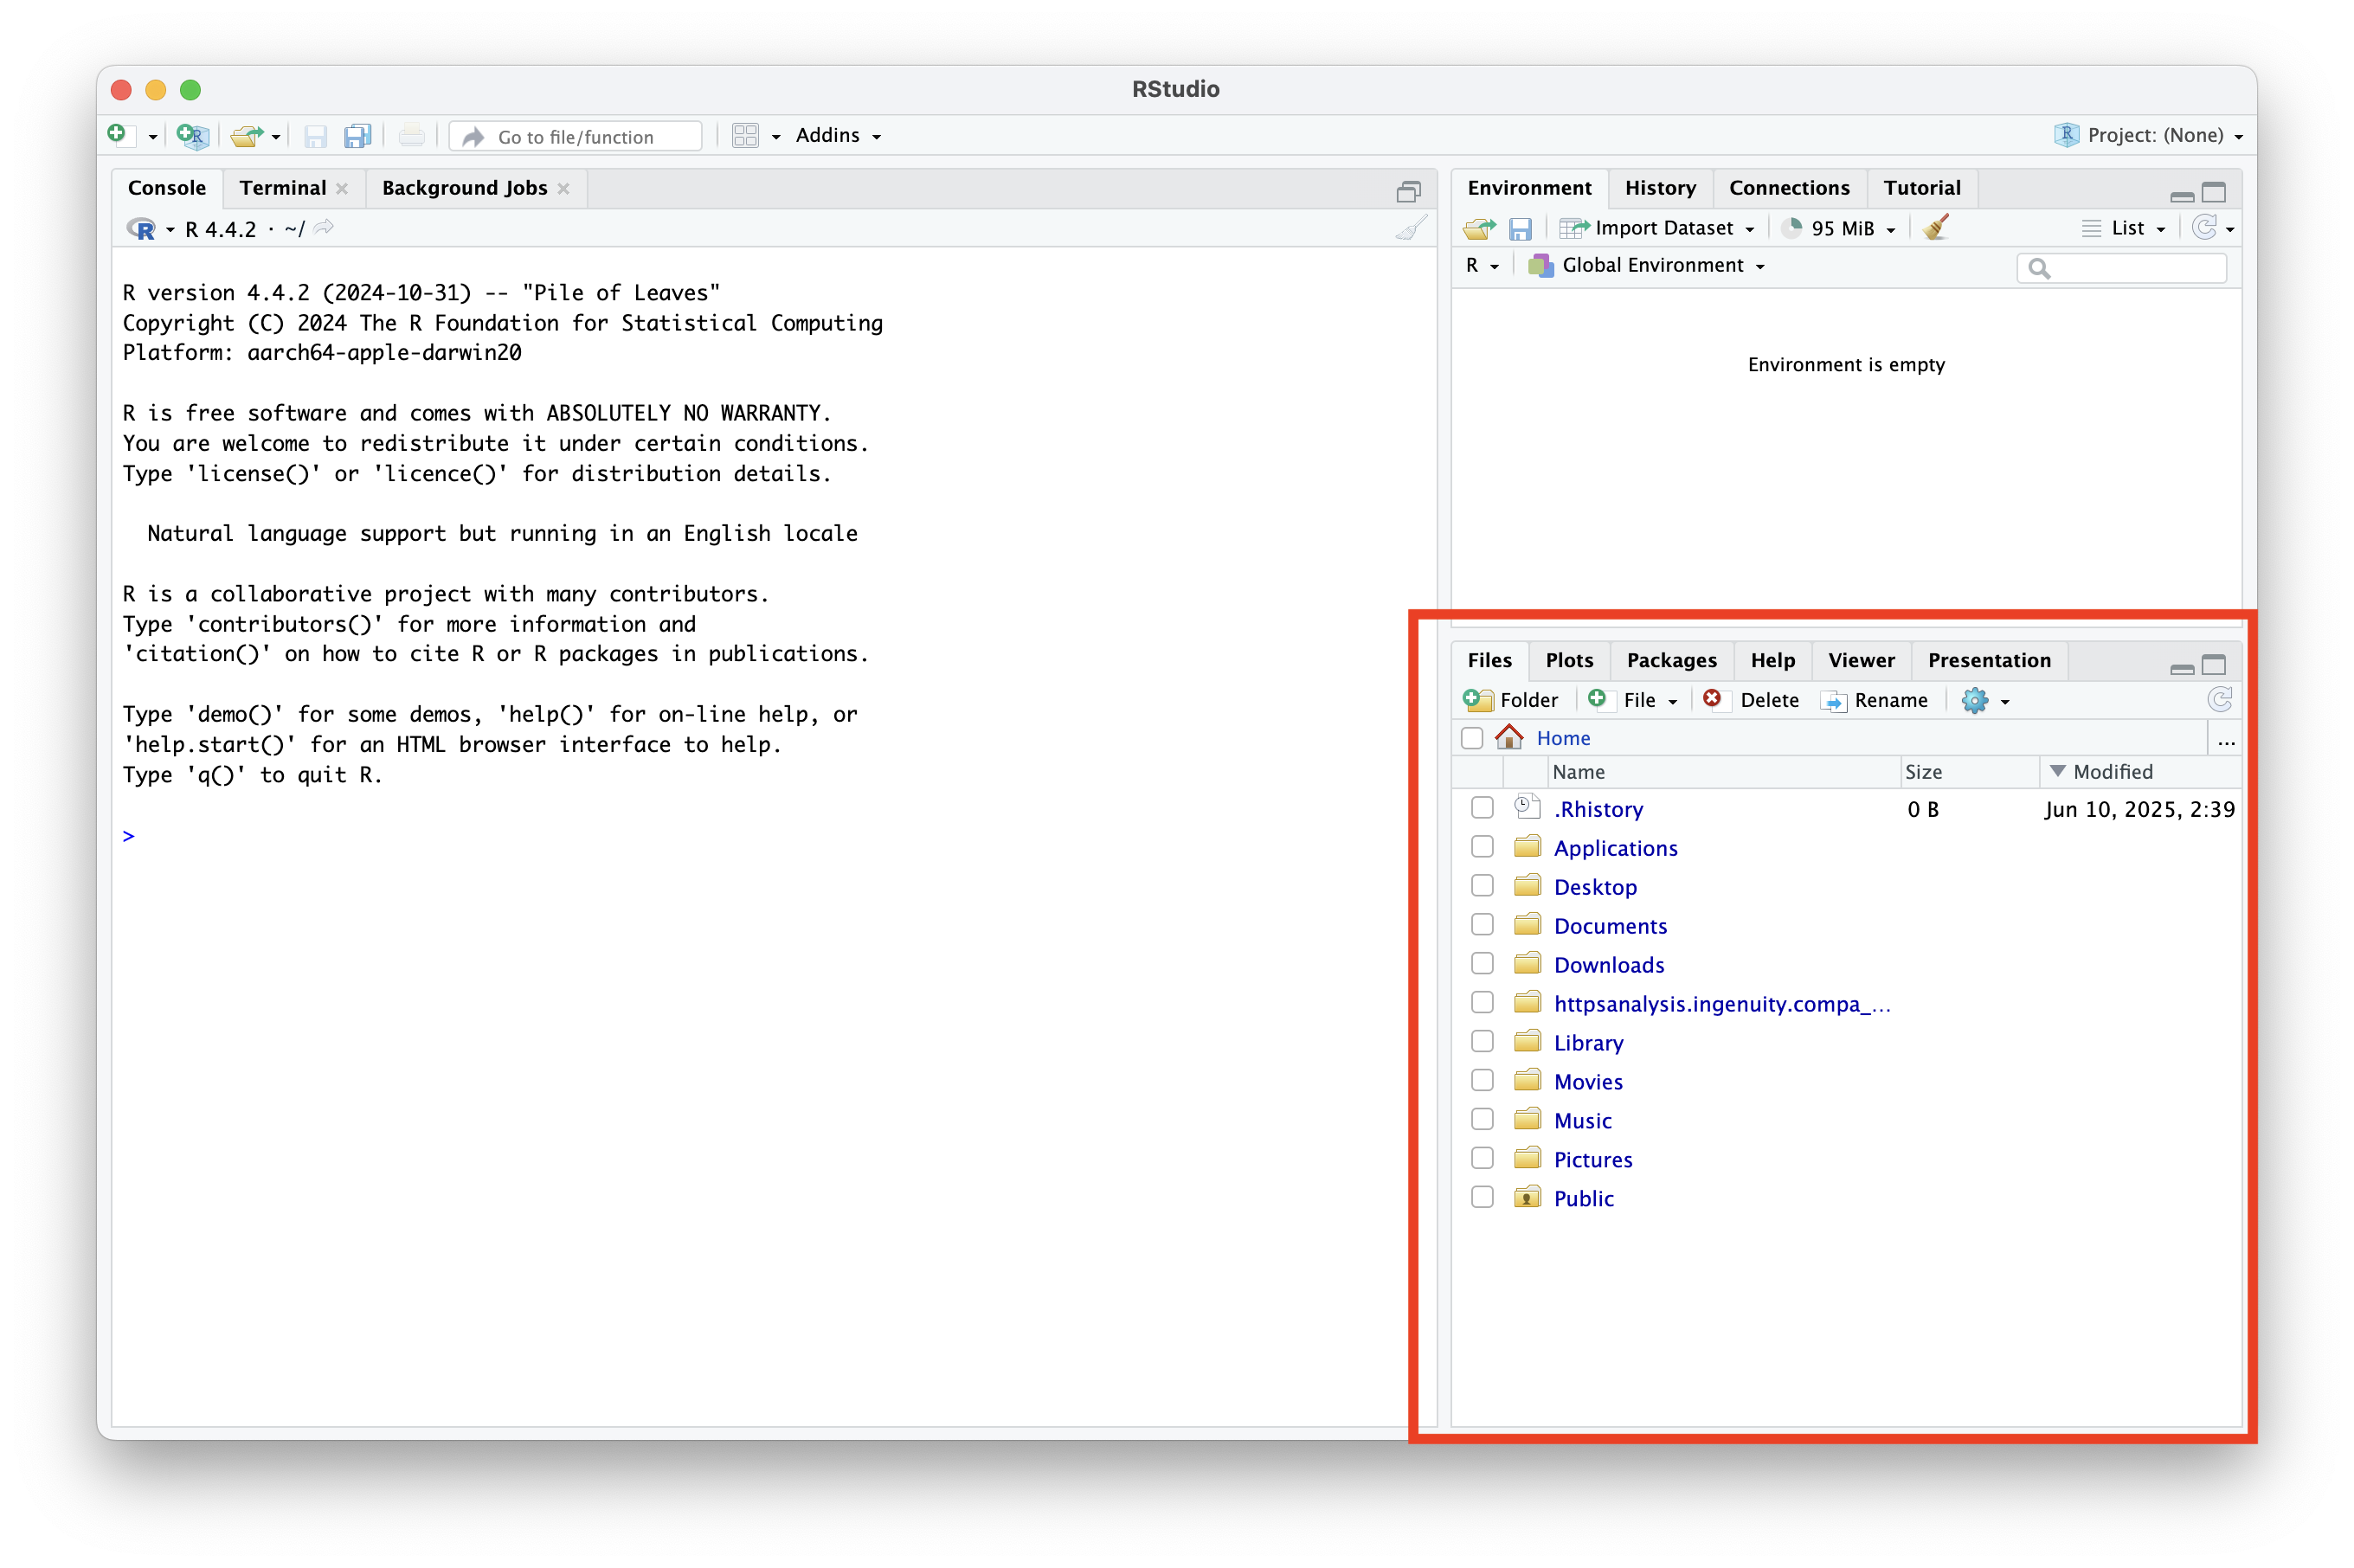
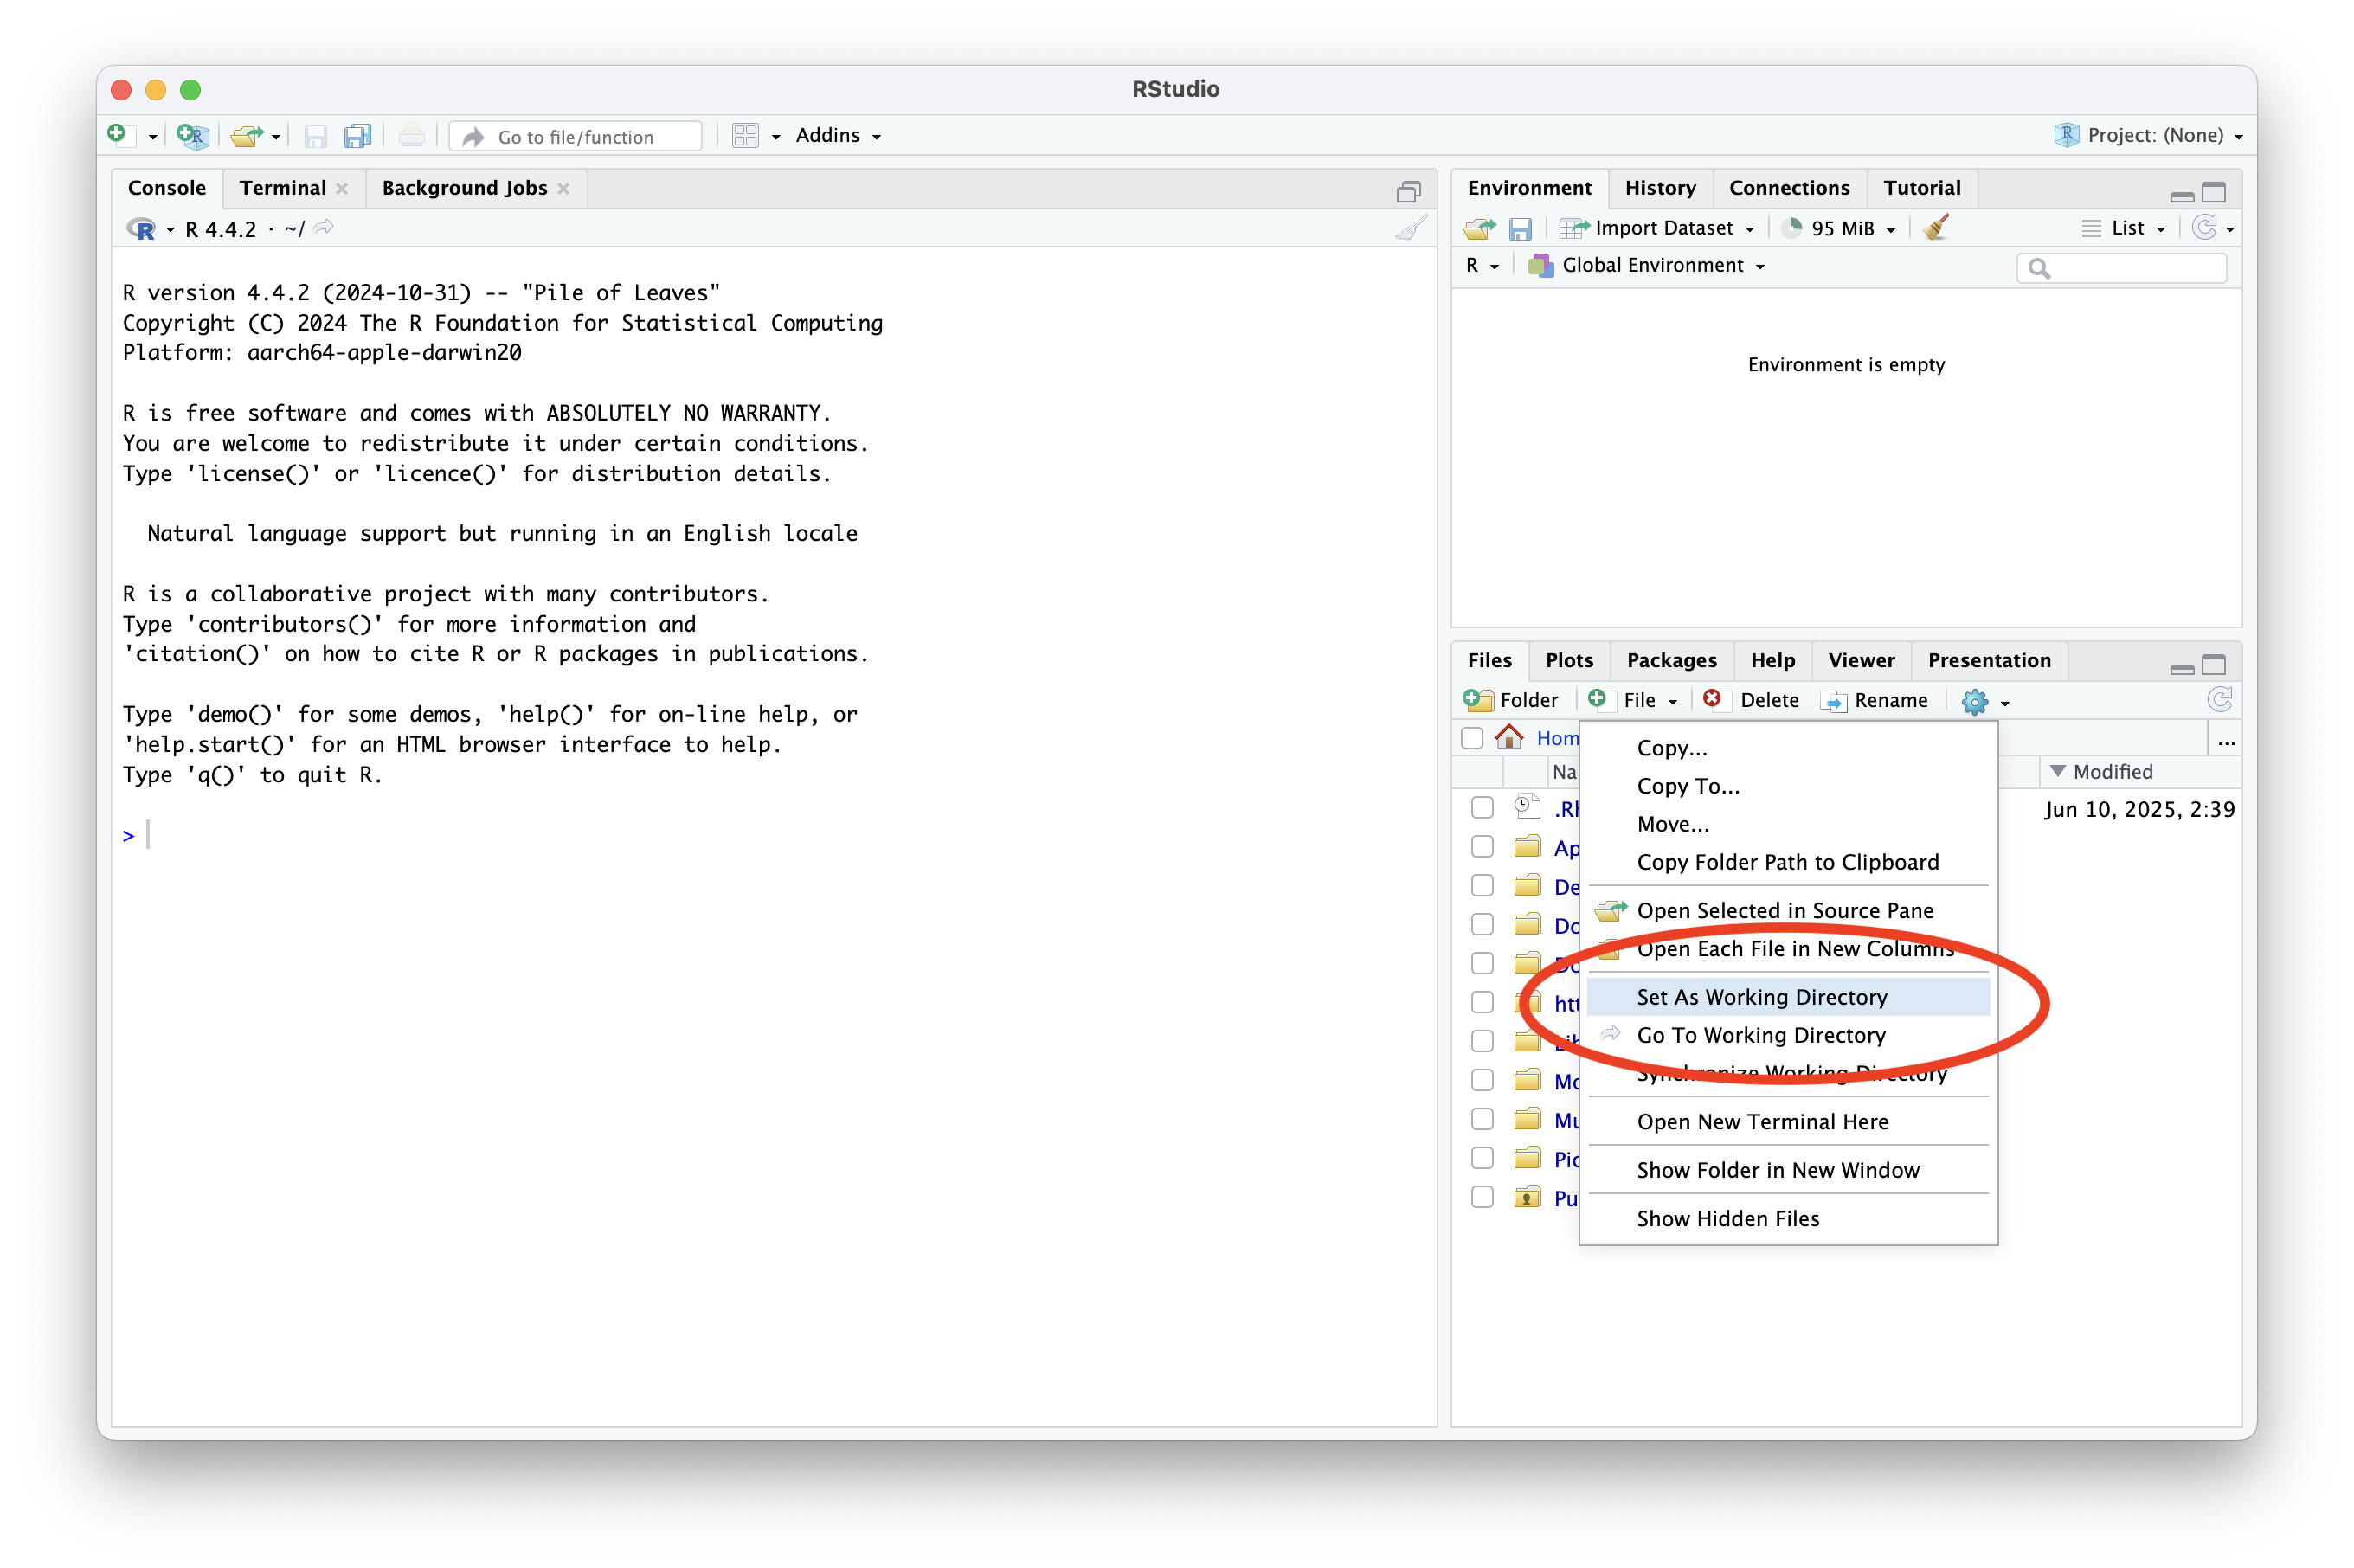
Once in the remote repository, click the gears icon and Set As Working Directory.
4 - Setting Up Quarto Website Project in Repository
Make sure your working directory is in your local repository
Find the terminal tab in your RStudio window:
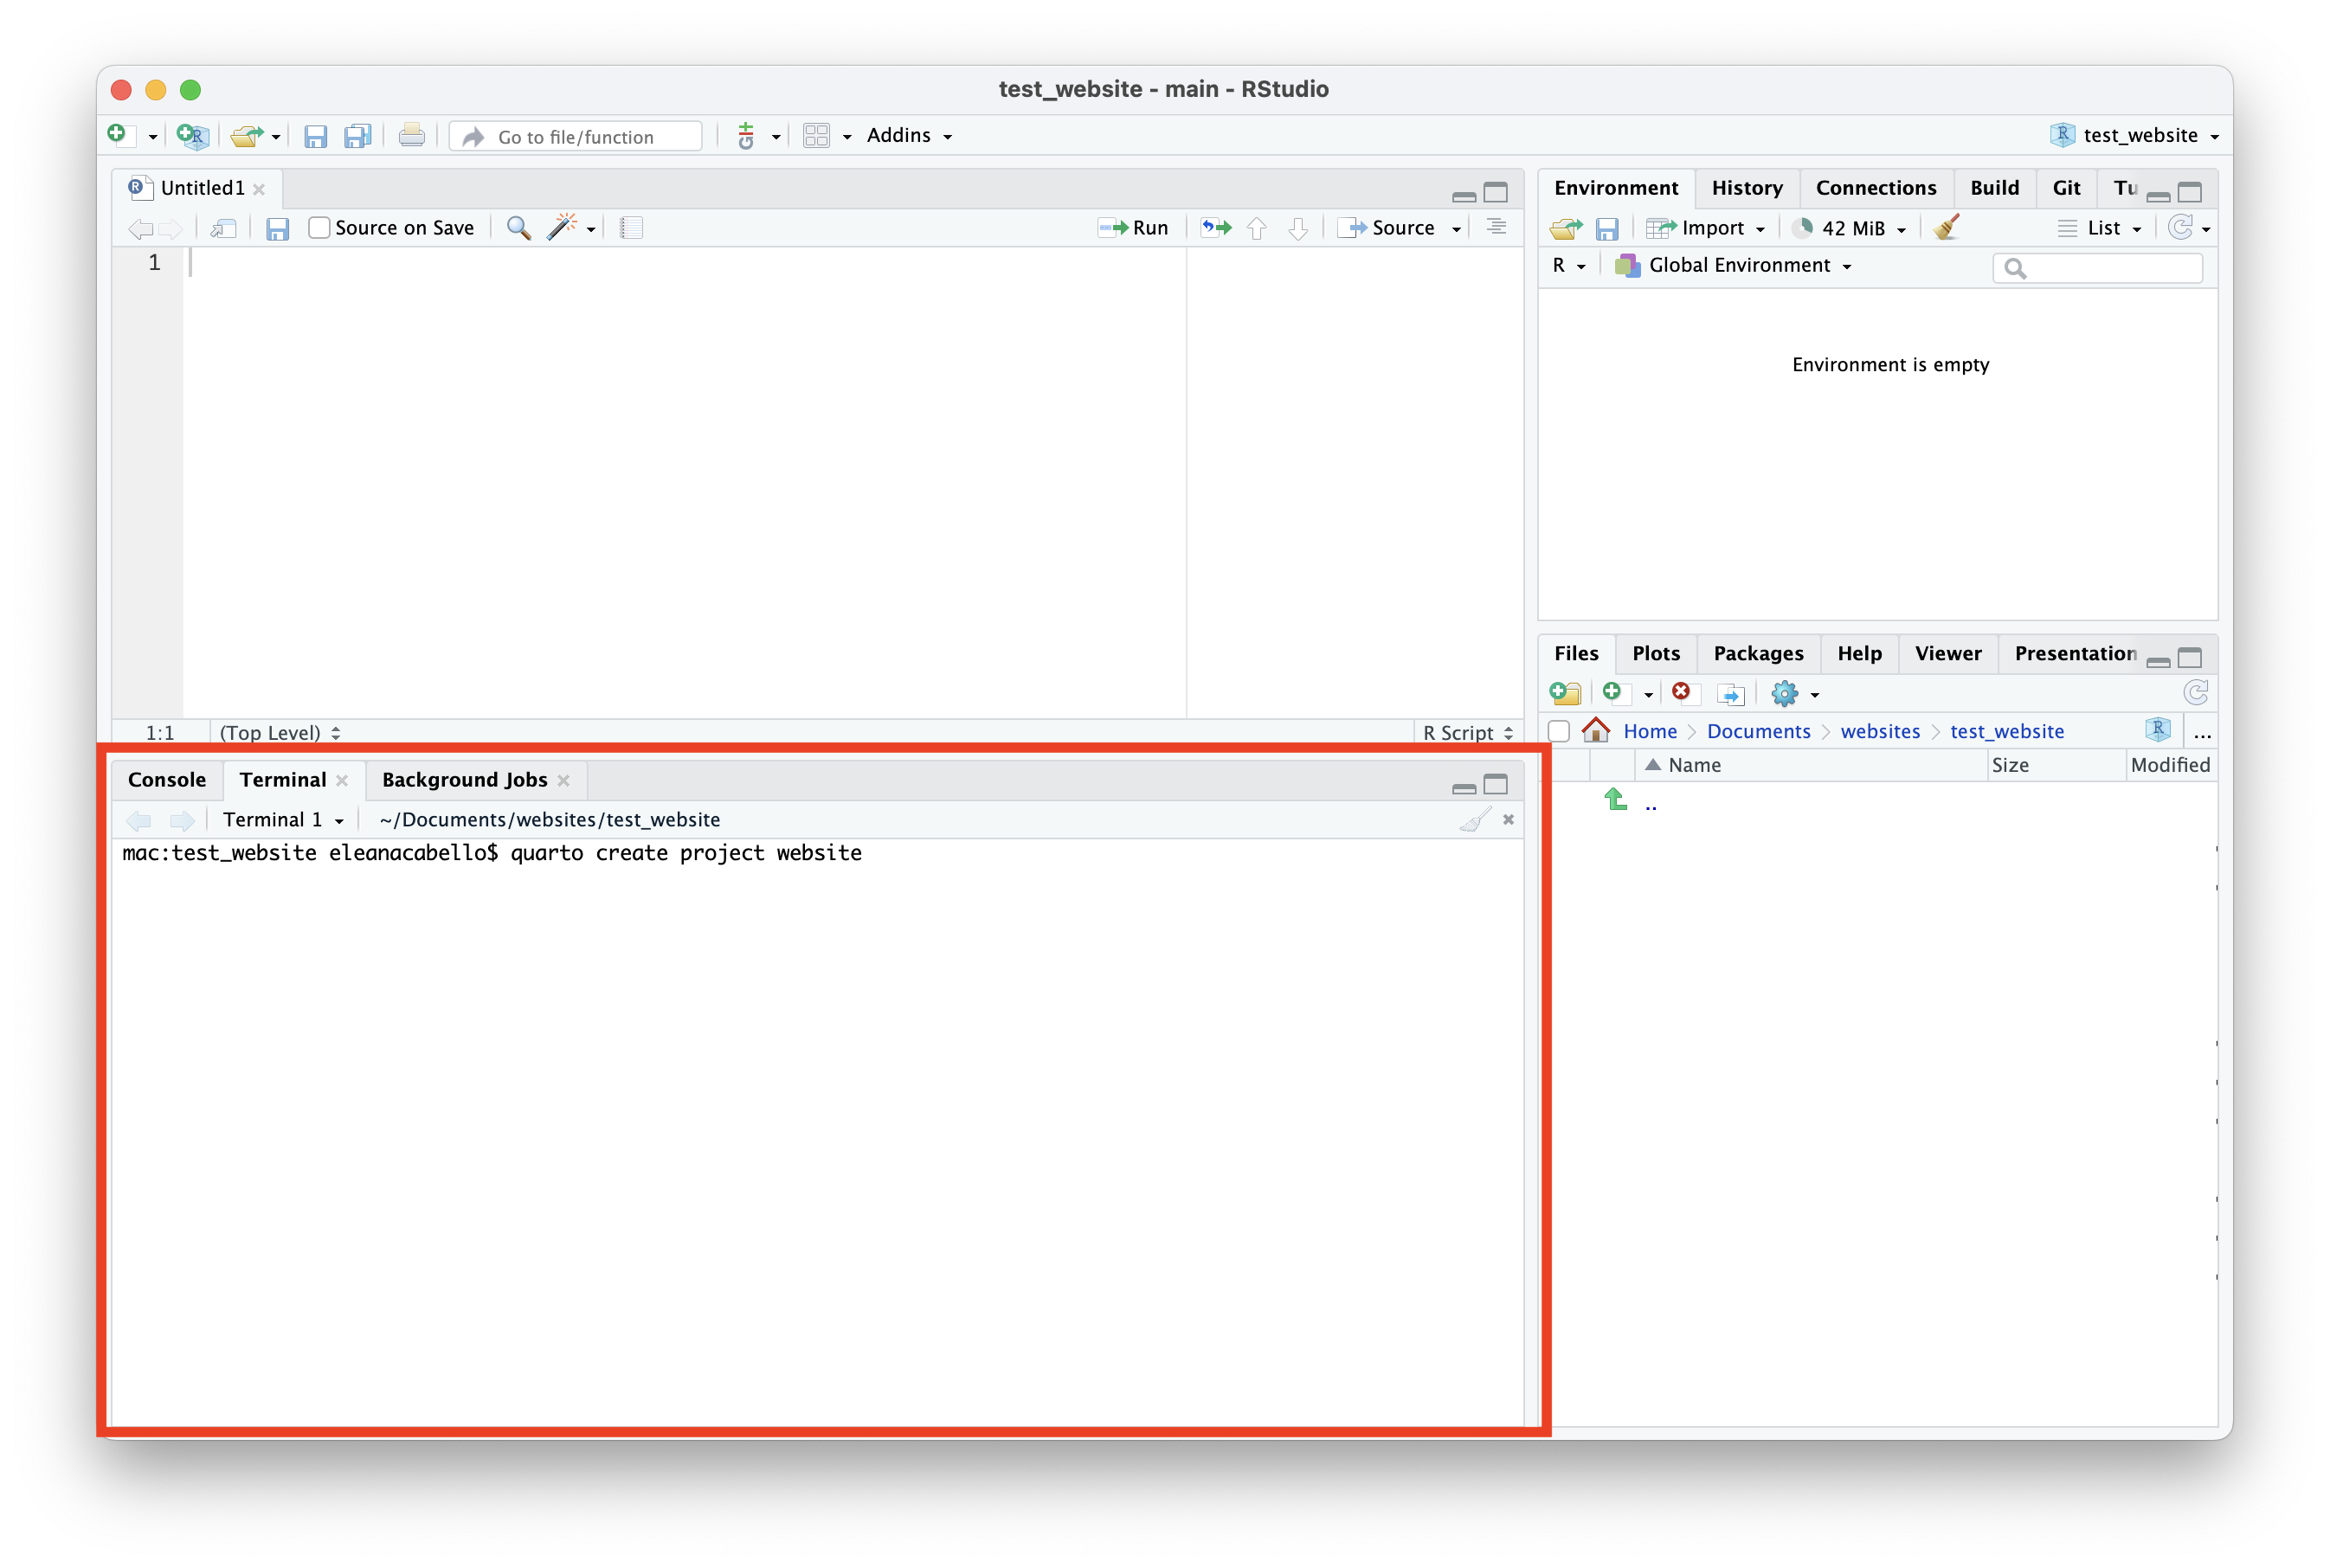
4 - Setting Up Quarto Website Project in Repository
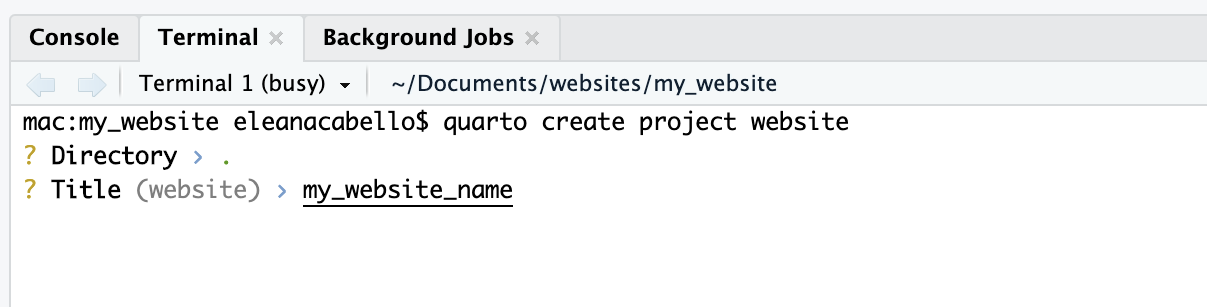
Type the following command in the terminal to create an RProject and setup a quarto website, a new window of RStudio will appear:
When asked for Directory put . for the current directory and when asked for a Title give it the title of your project with no spaces (use _ instead):
On the new Rstudio window refresh and check out the new files by refreshing the files window:
- _quarto.yml
- index.qmd
- about.qmd
- styles.css
5 - Commiting and Pushing to Github Repository
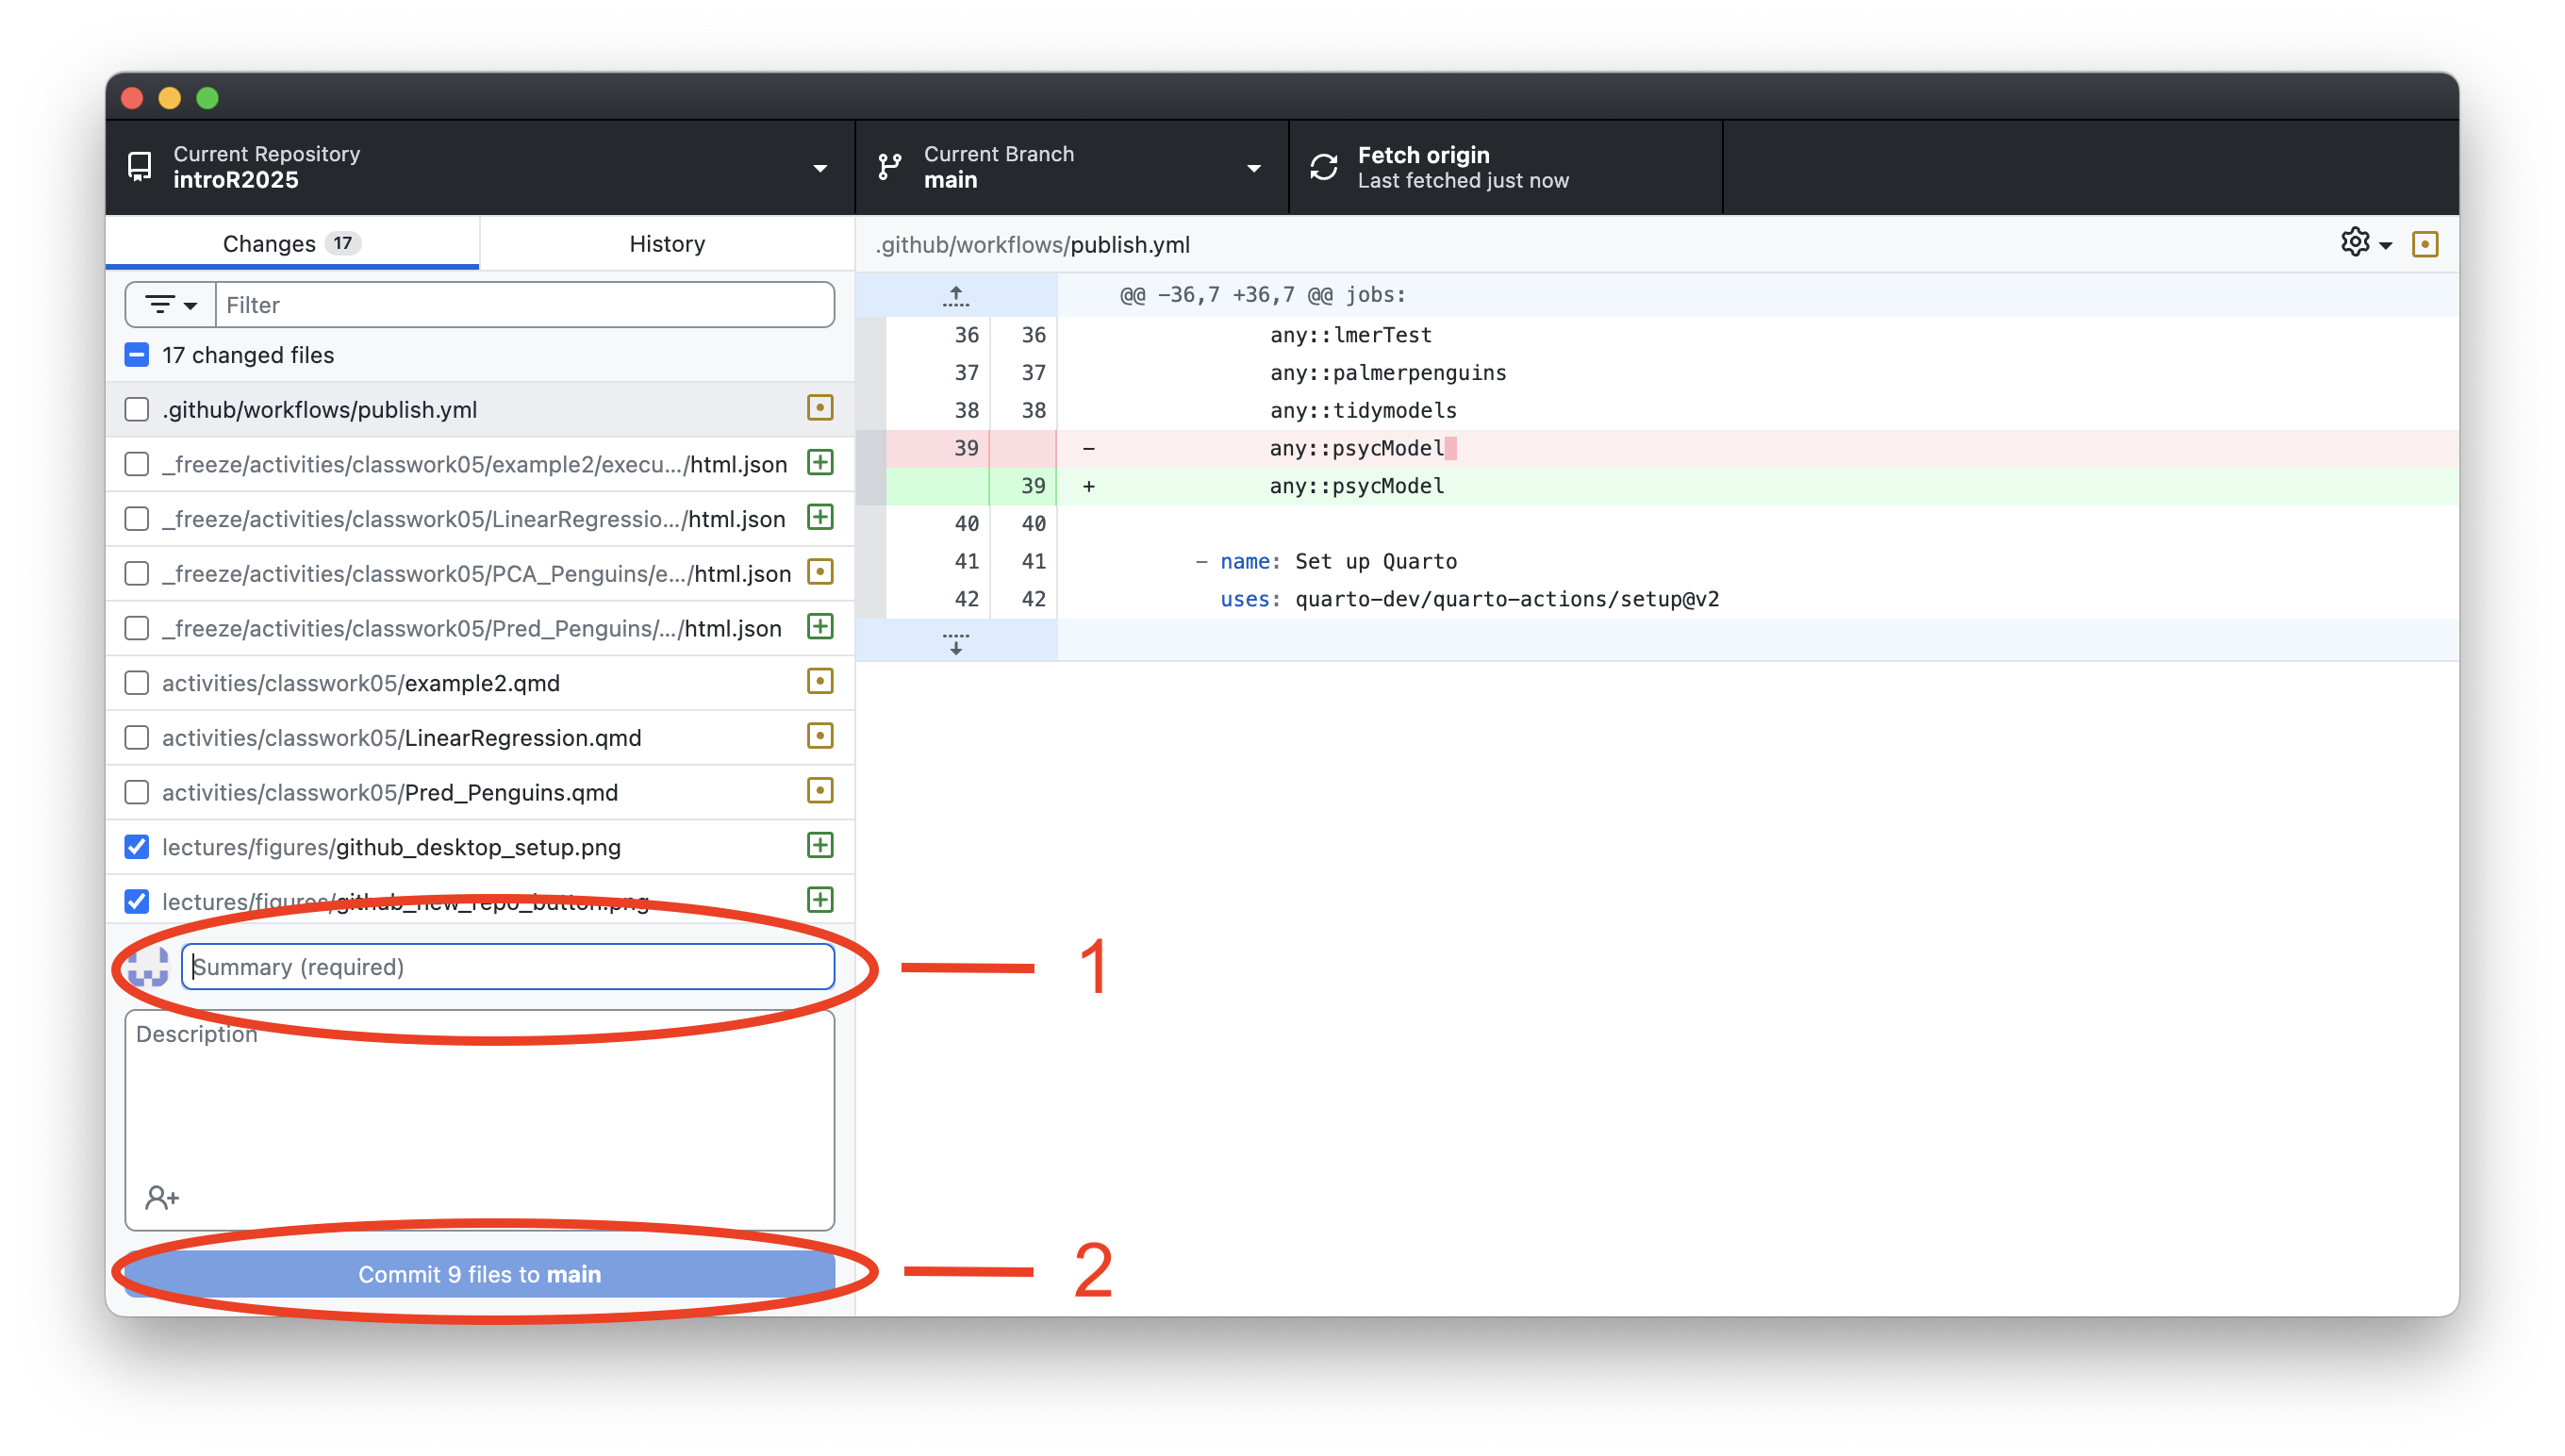
In Github desktop type a commit message and commit to main.
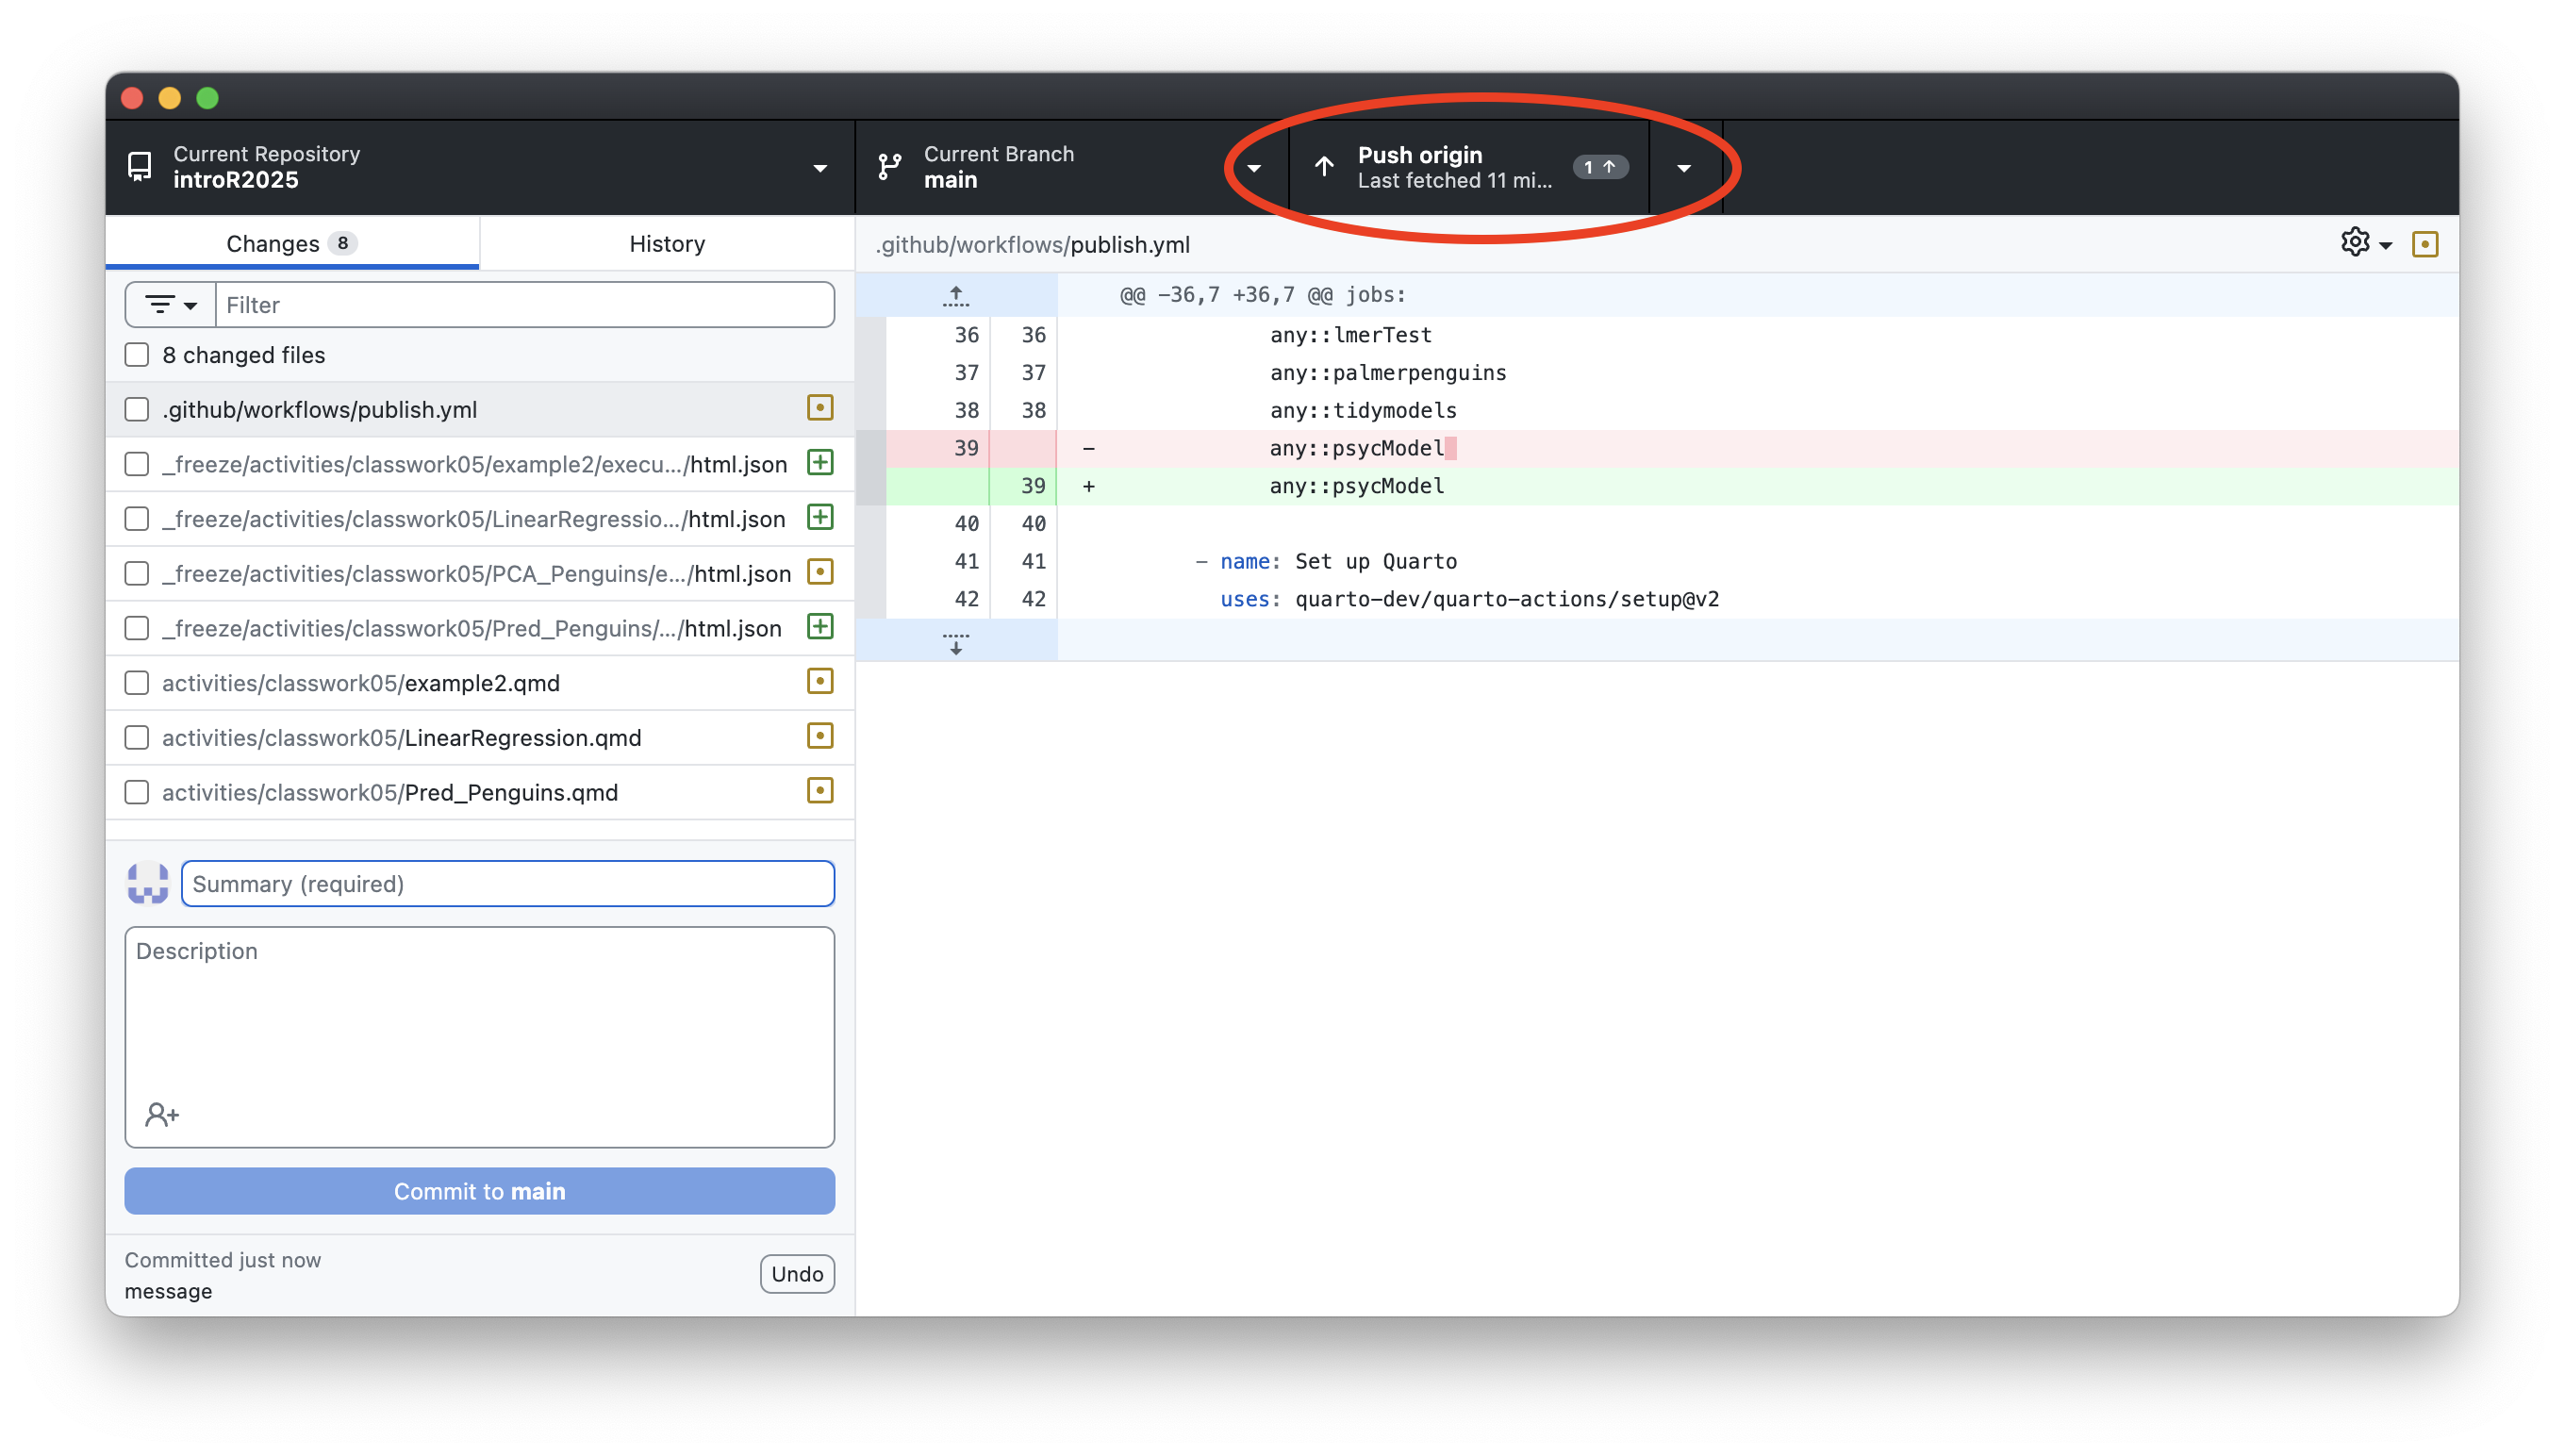
After commiting your changes and message, hit publish to origin.
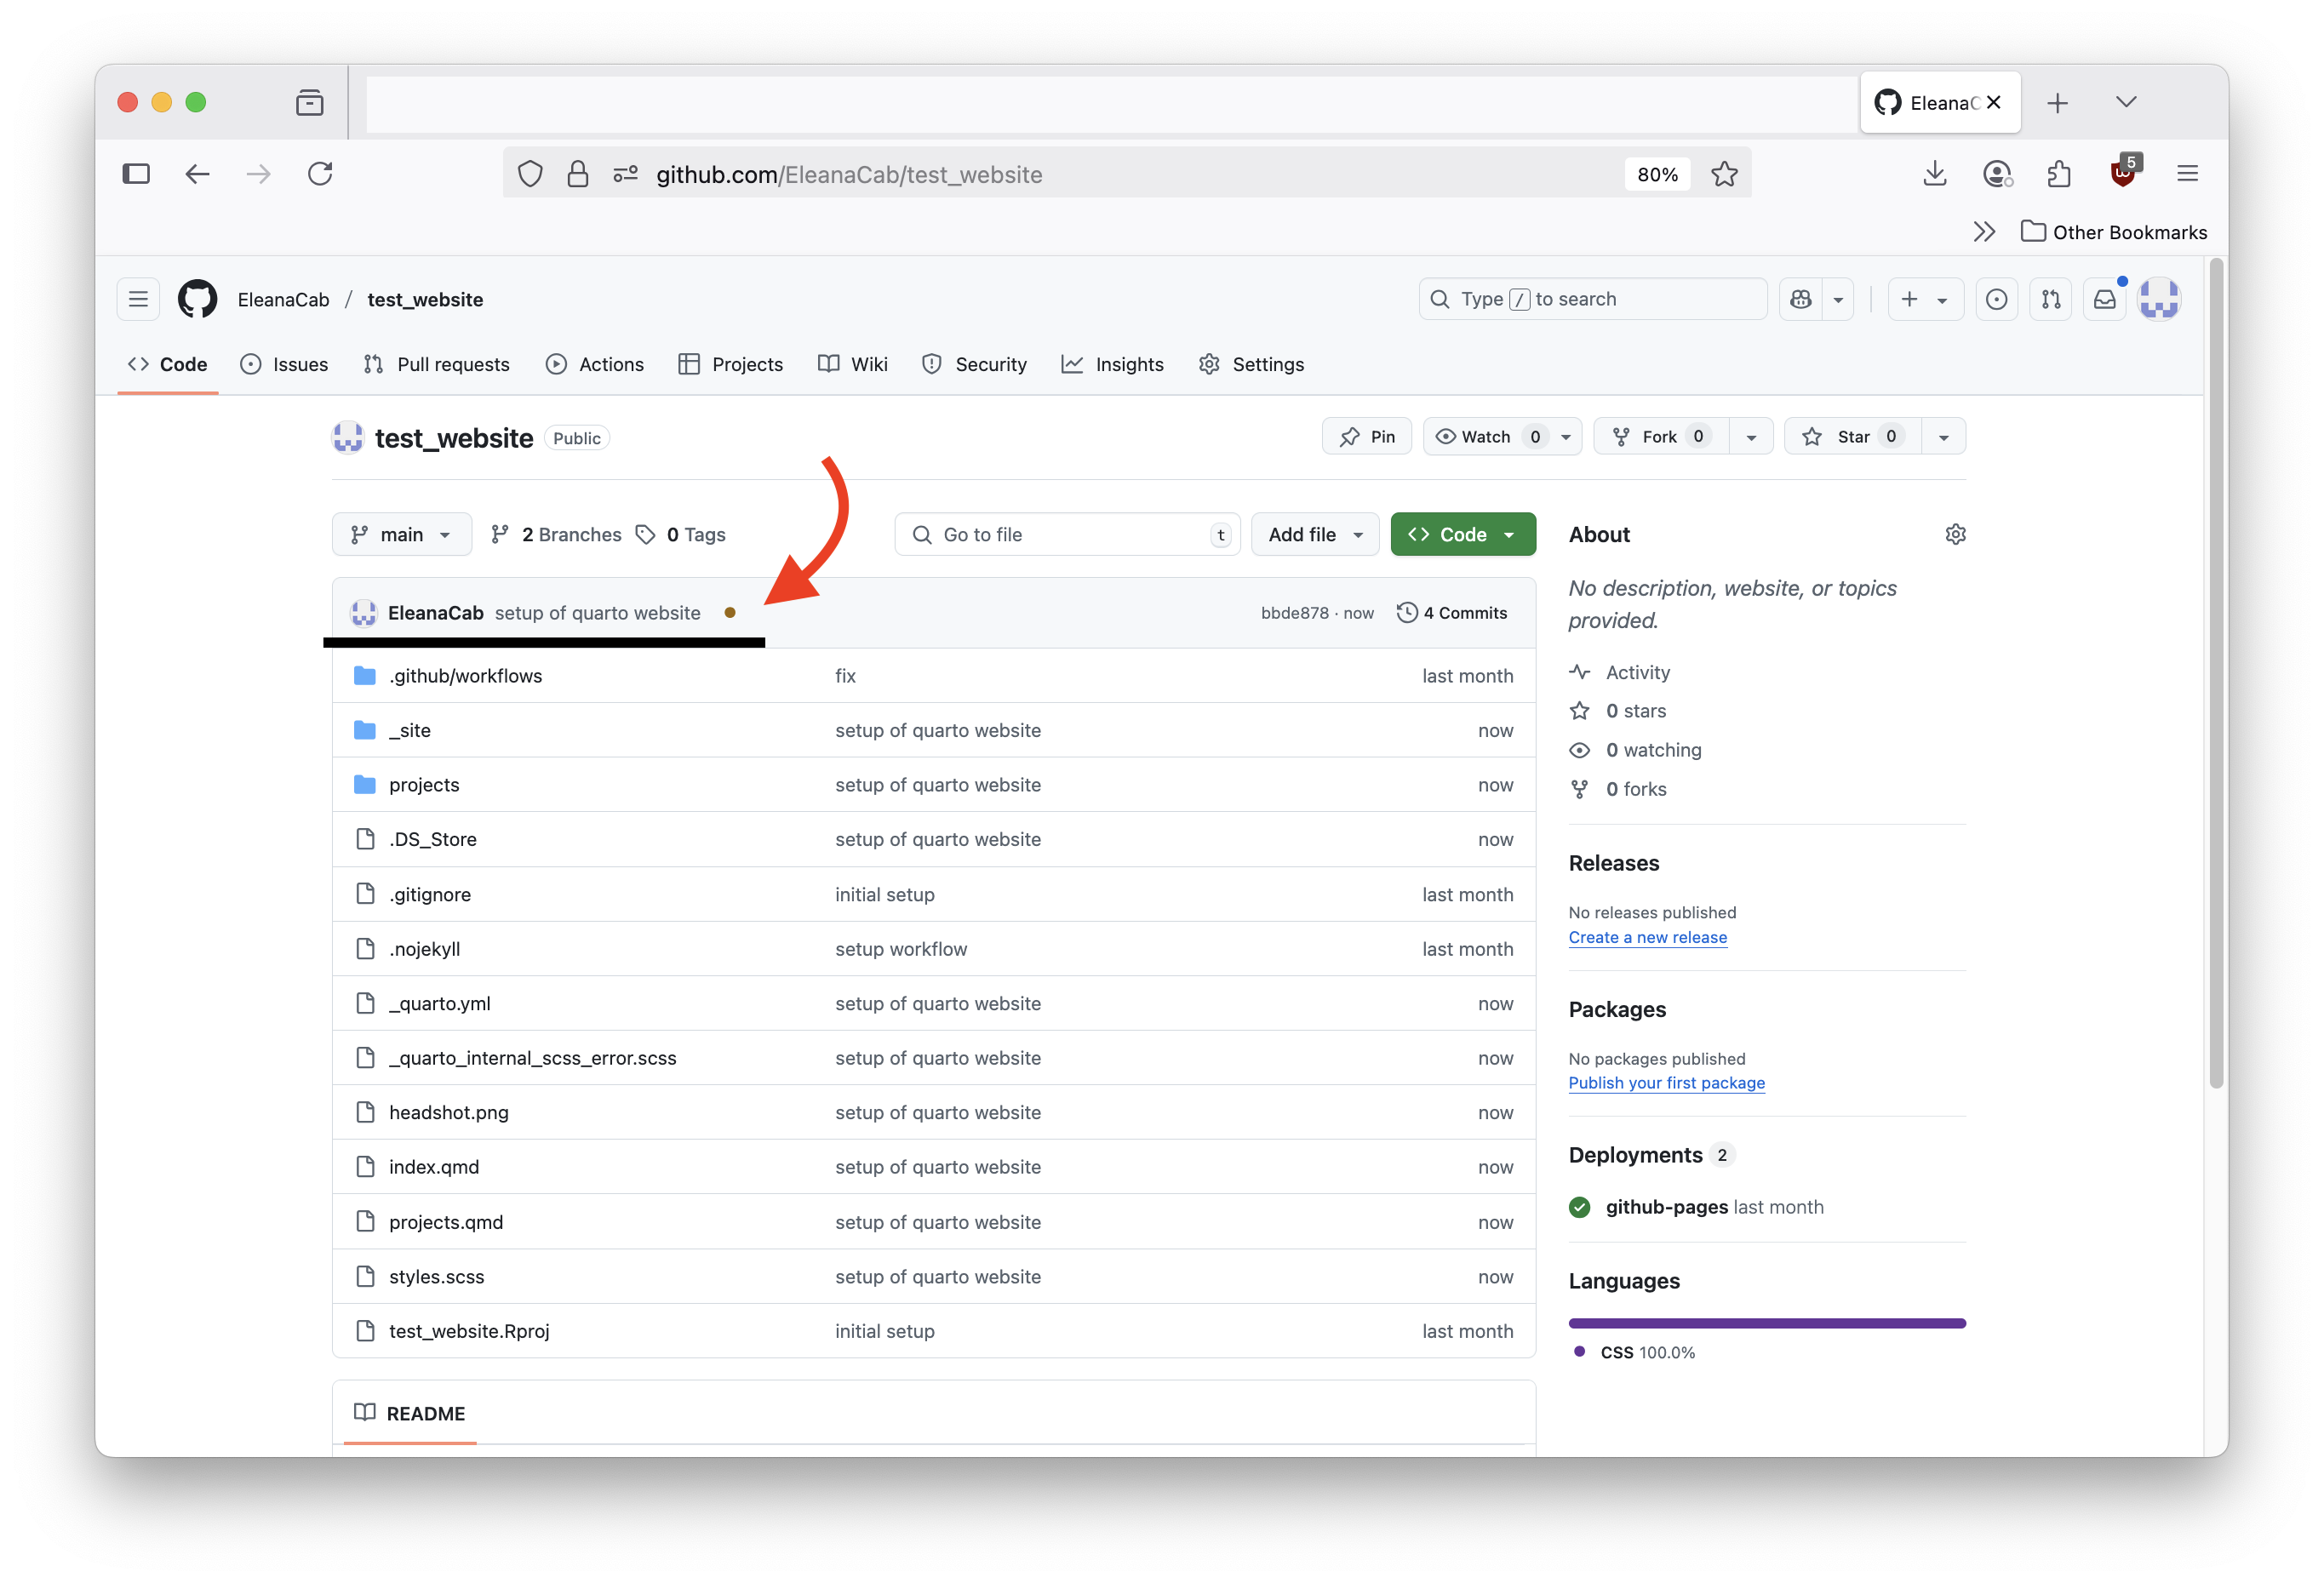
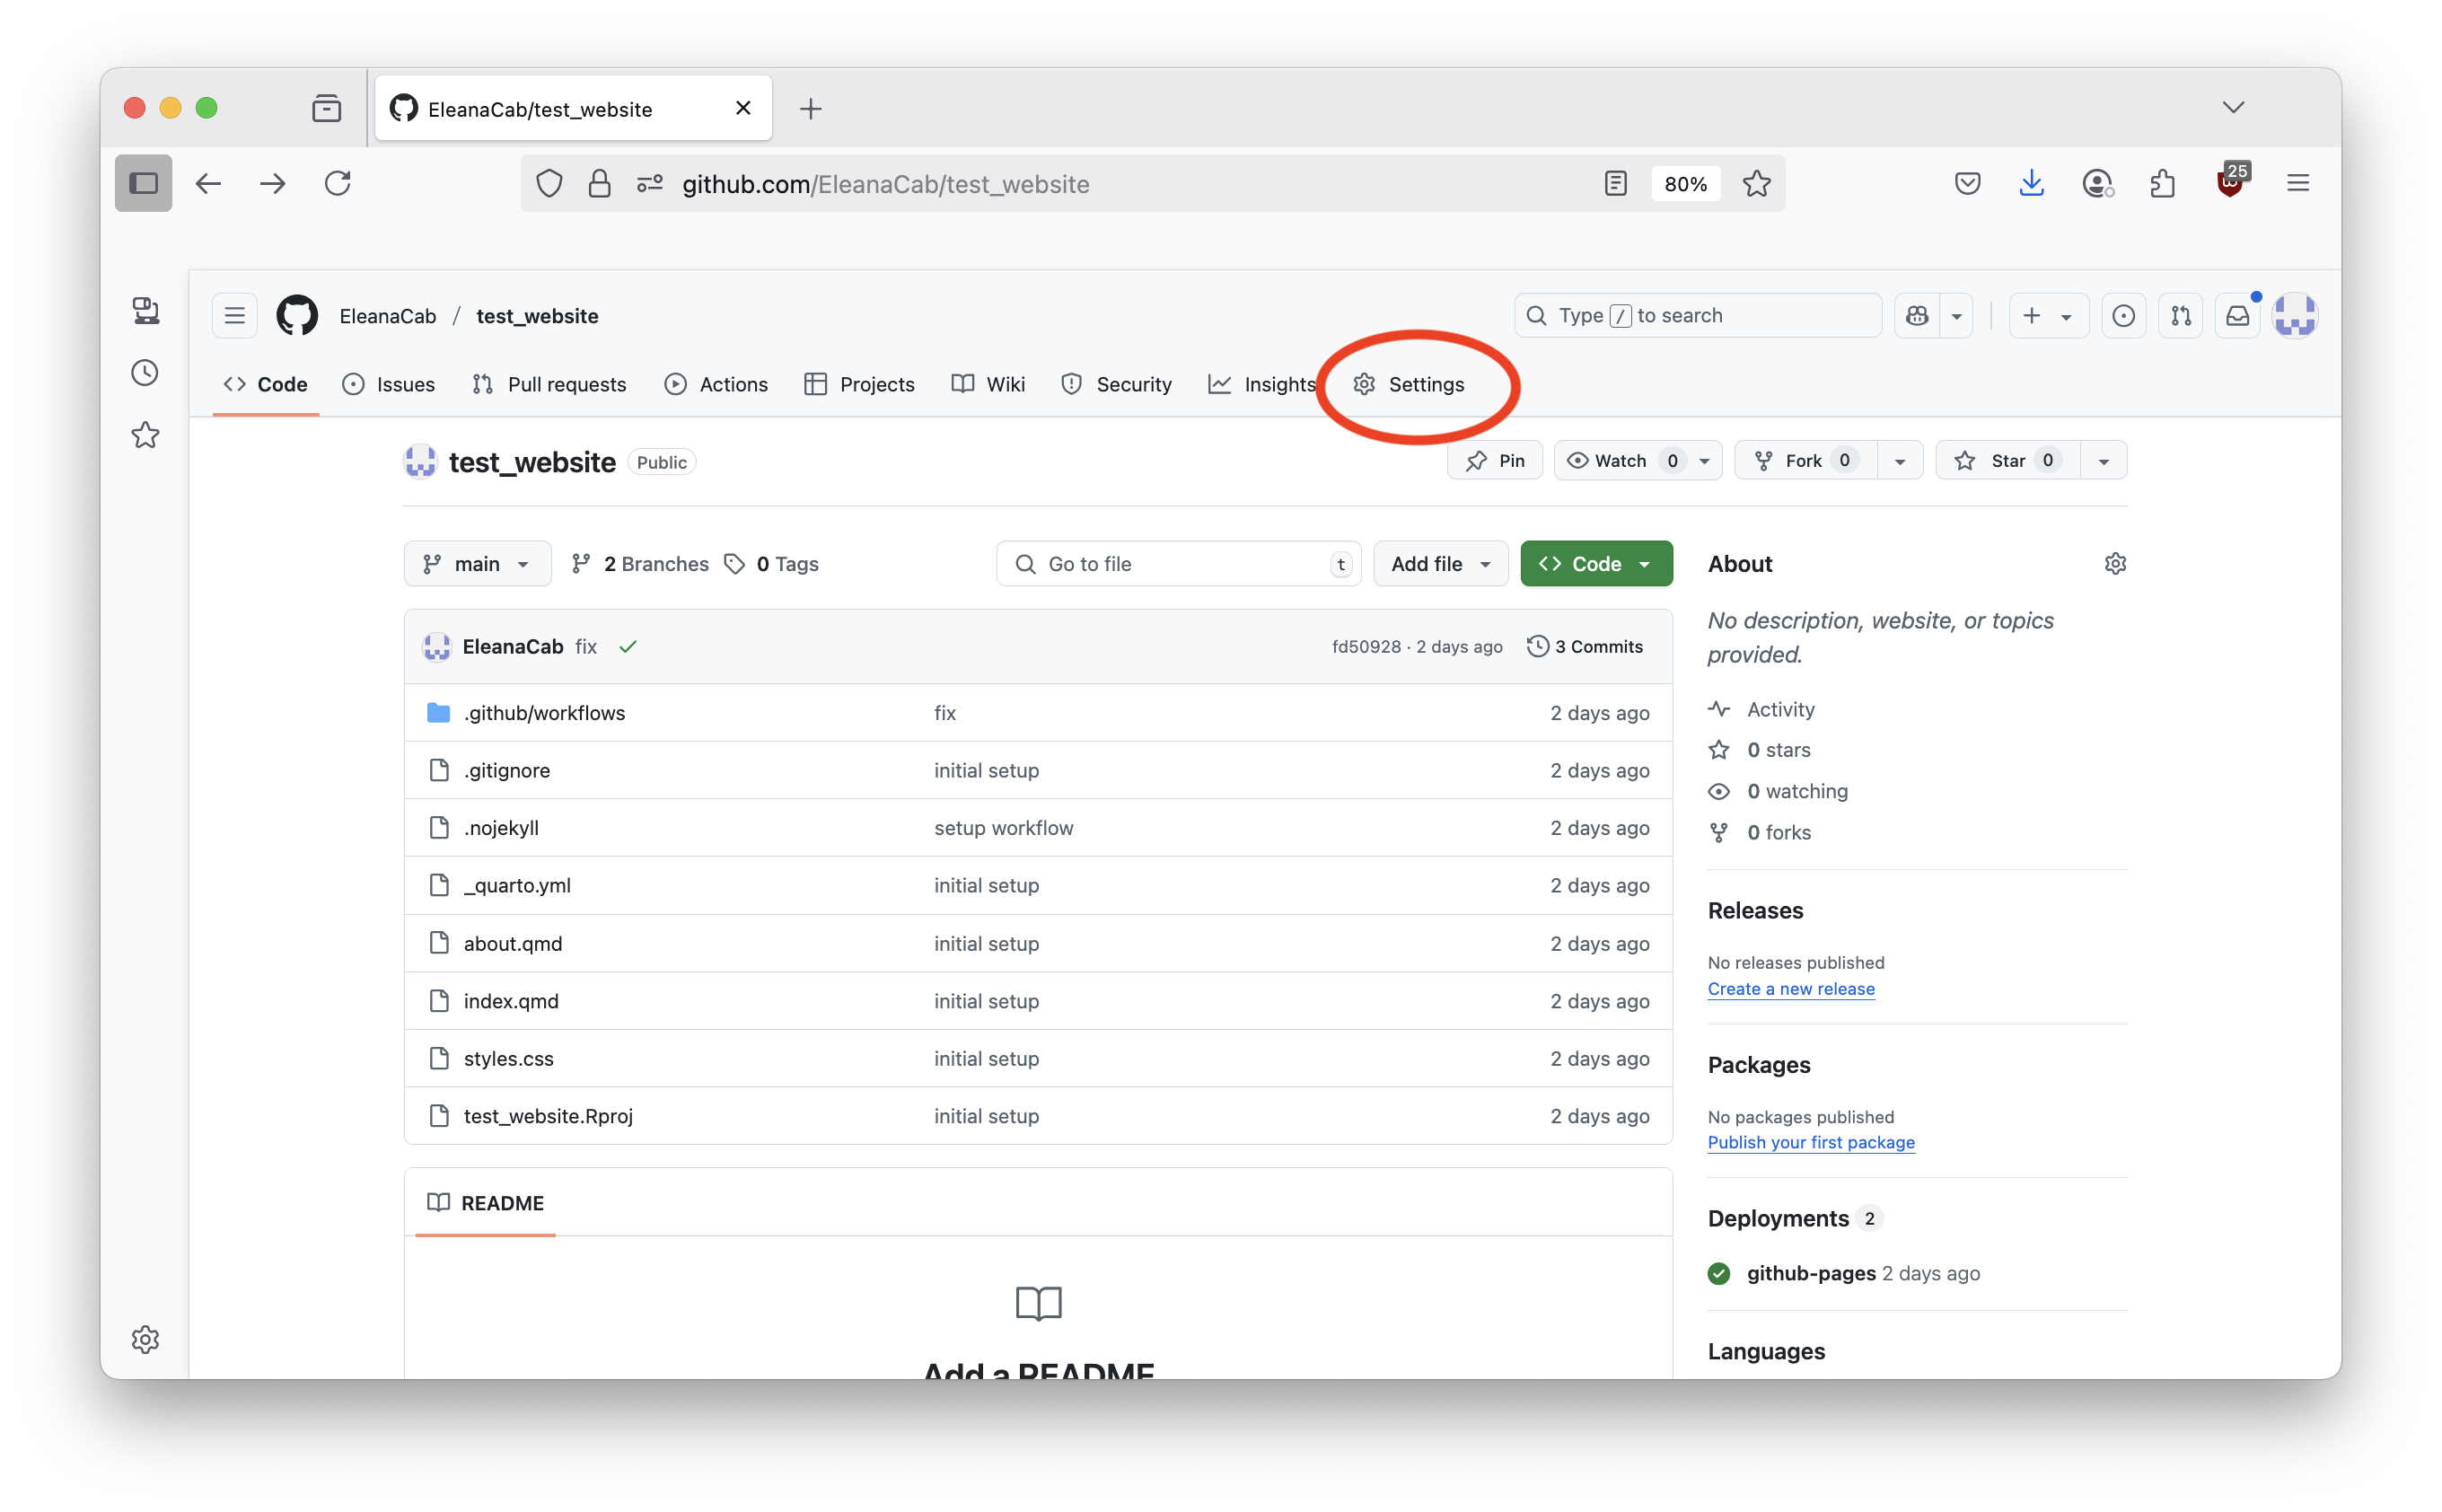
Back in your GitHub account, you should see the brown circle indicating GitHub is going through your workflow file and setting up your website:
After it has completed successfully the brown circle should turn to a green check mark, if it is not successful it will turn into a red x:

6 - Setting Up to Publish to Github Pages using a gh-pages branch
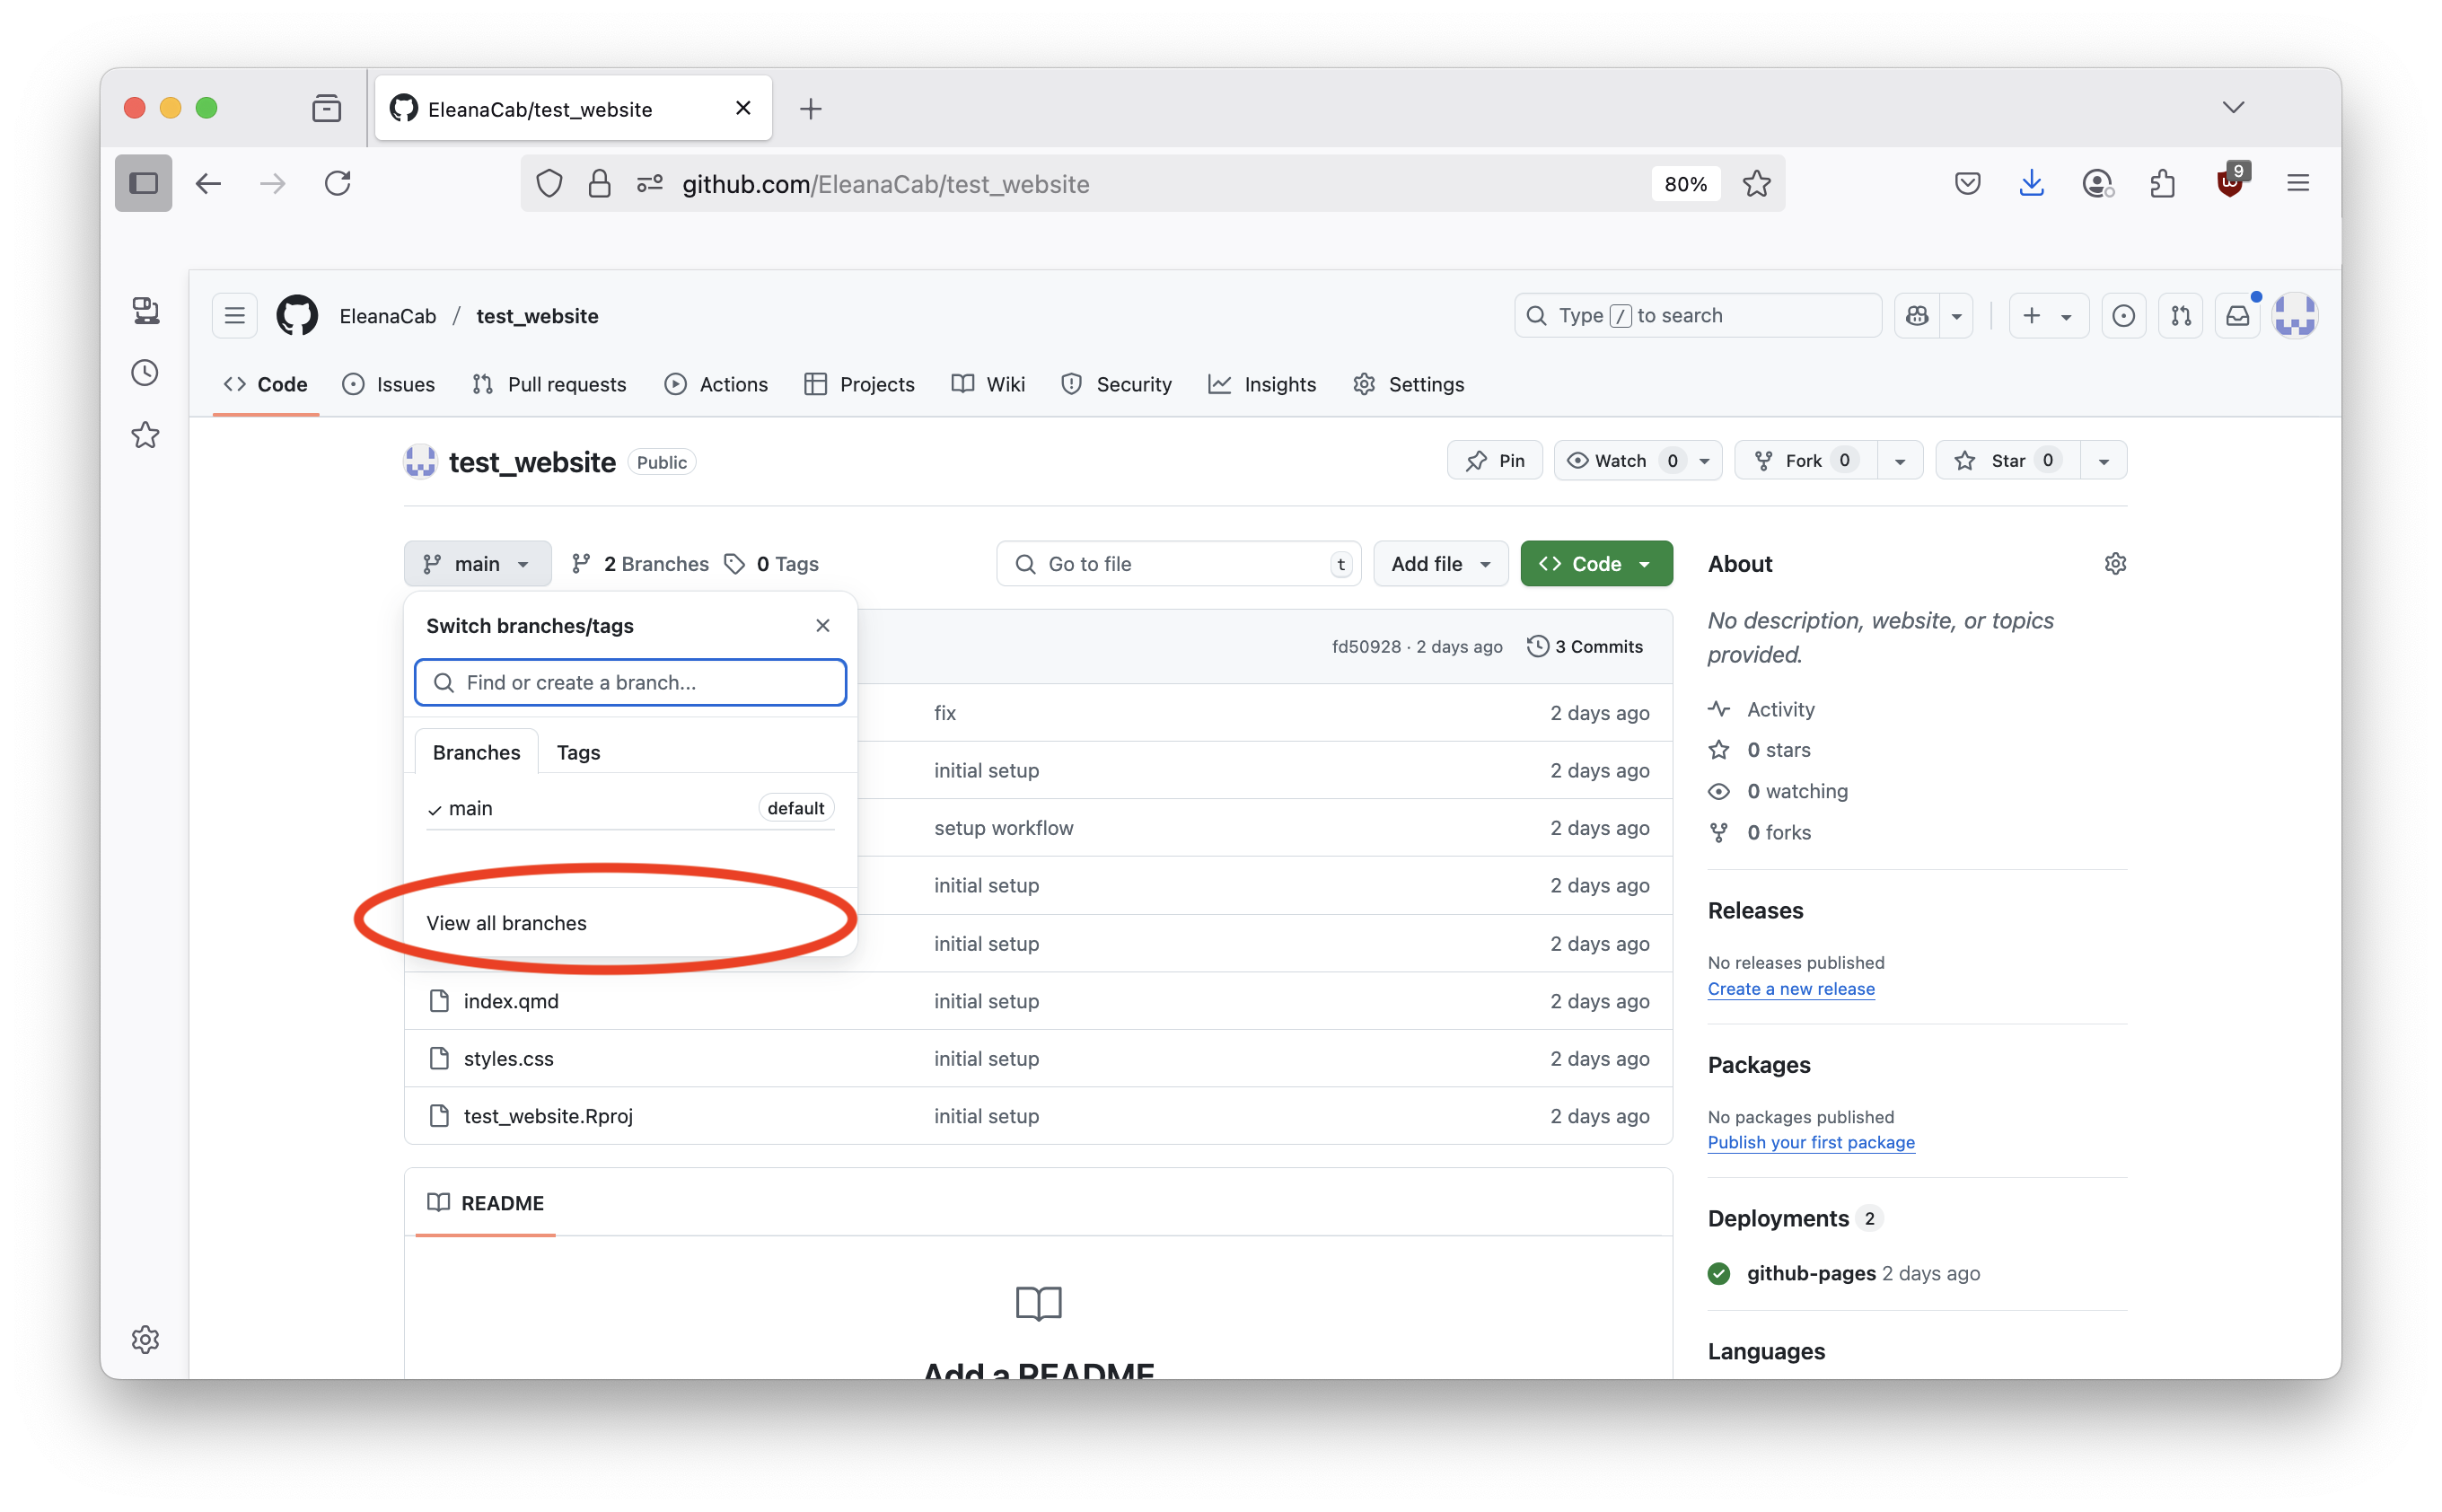
In Github website refresh and view all branches in the repository by following the steps below:
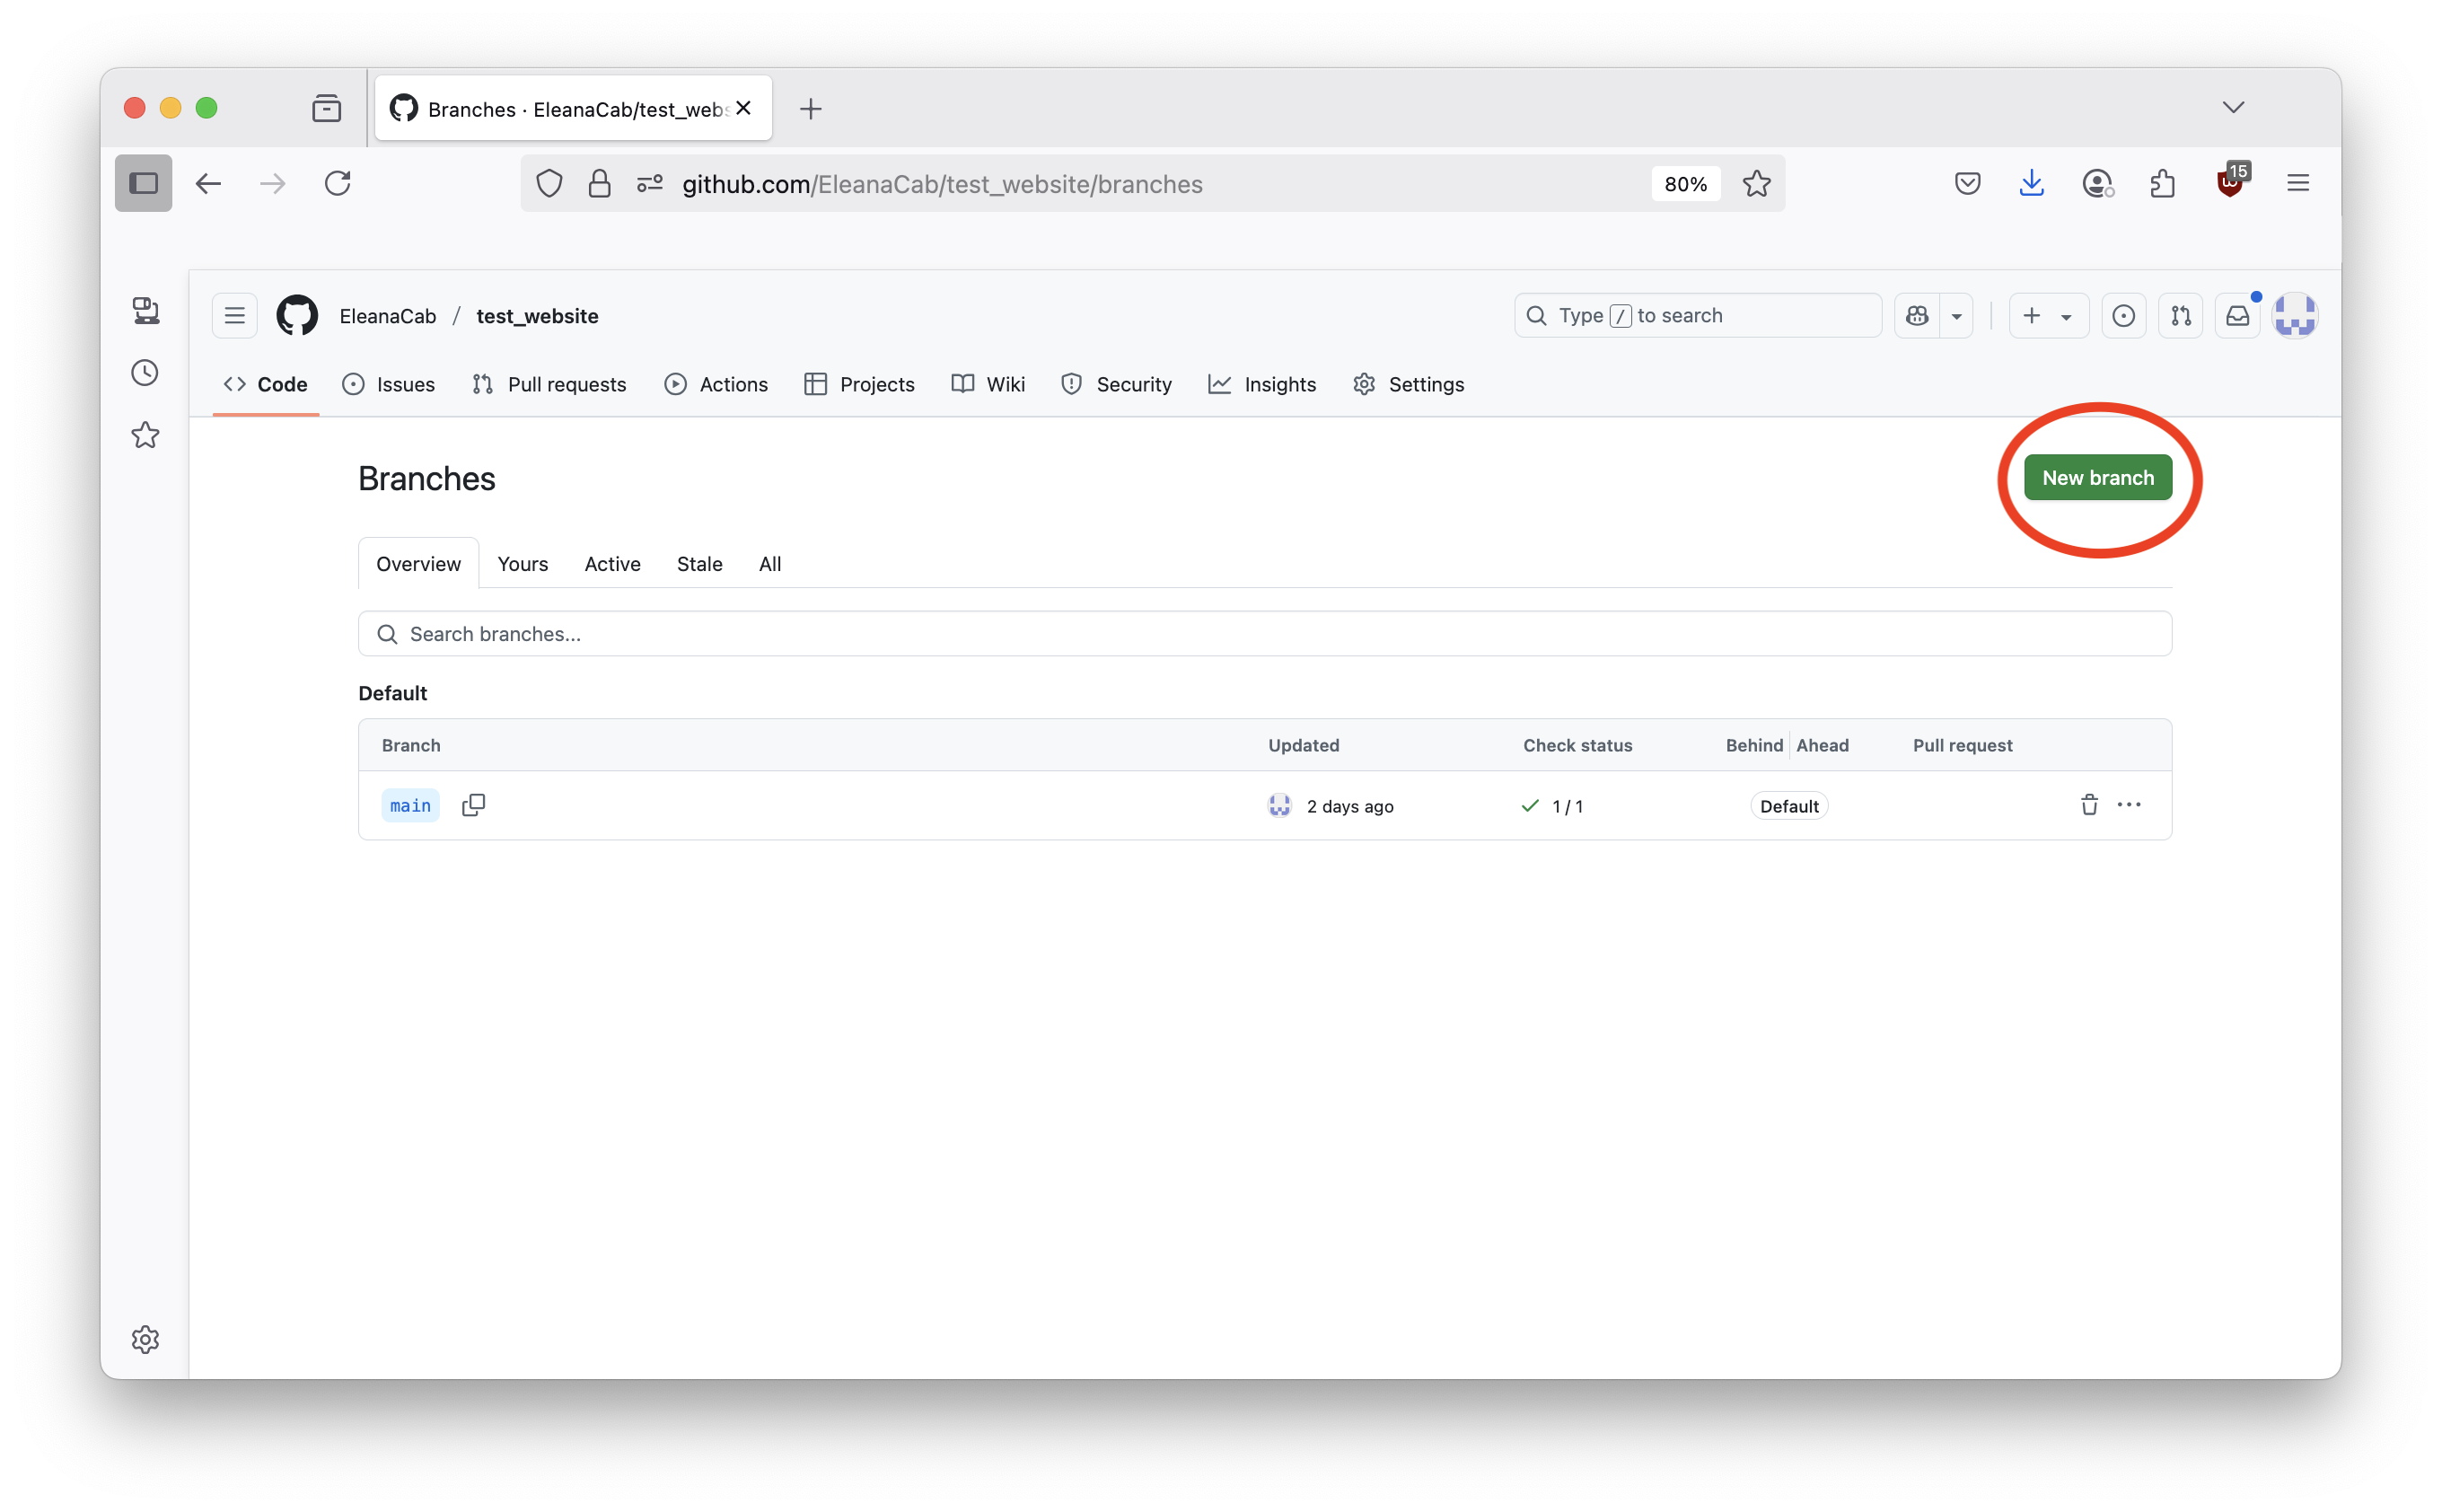
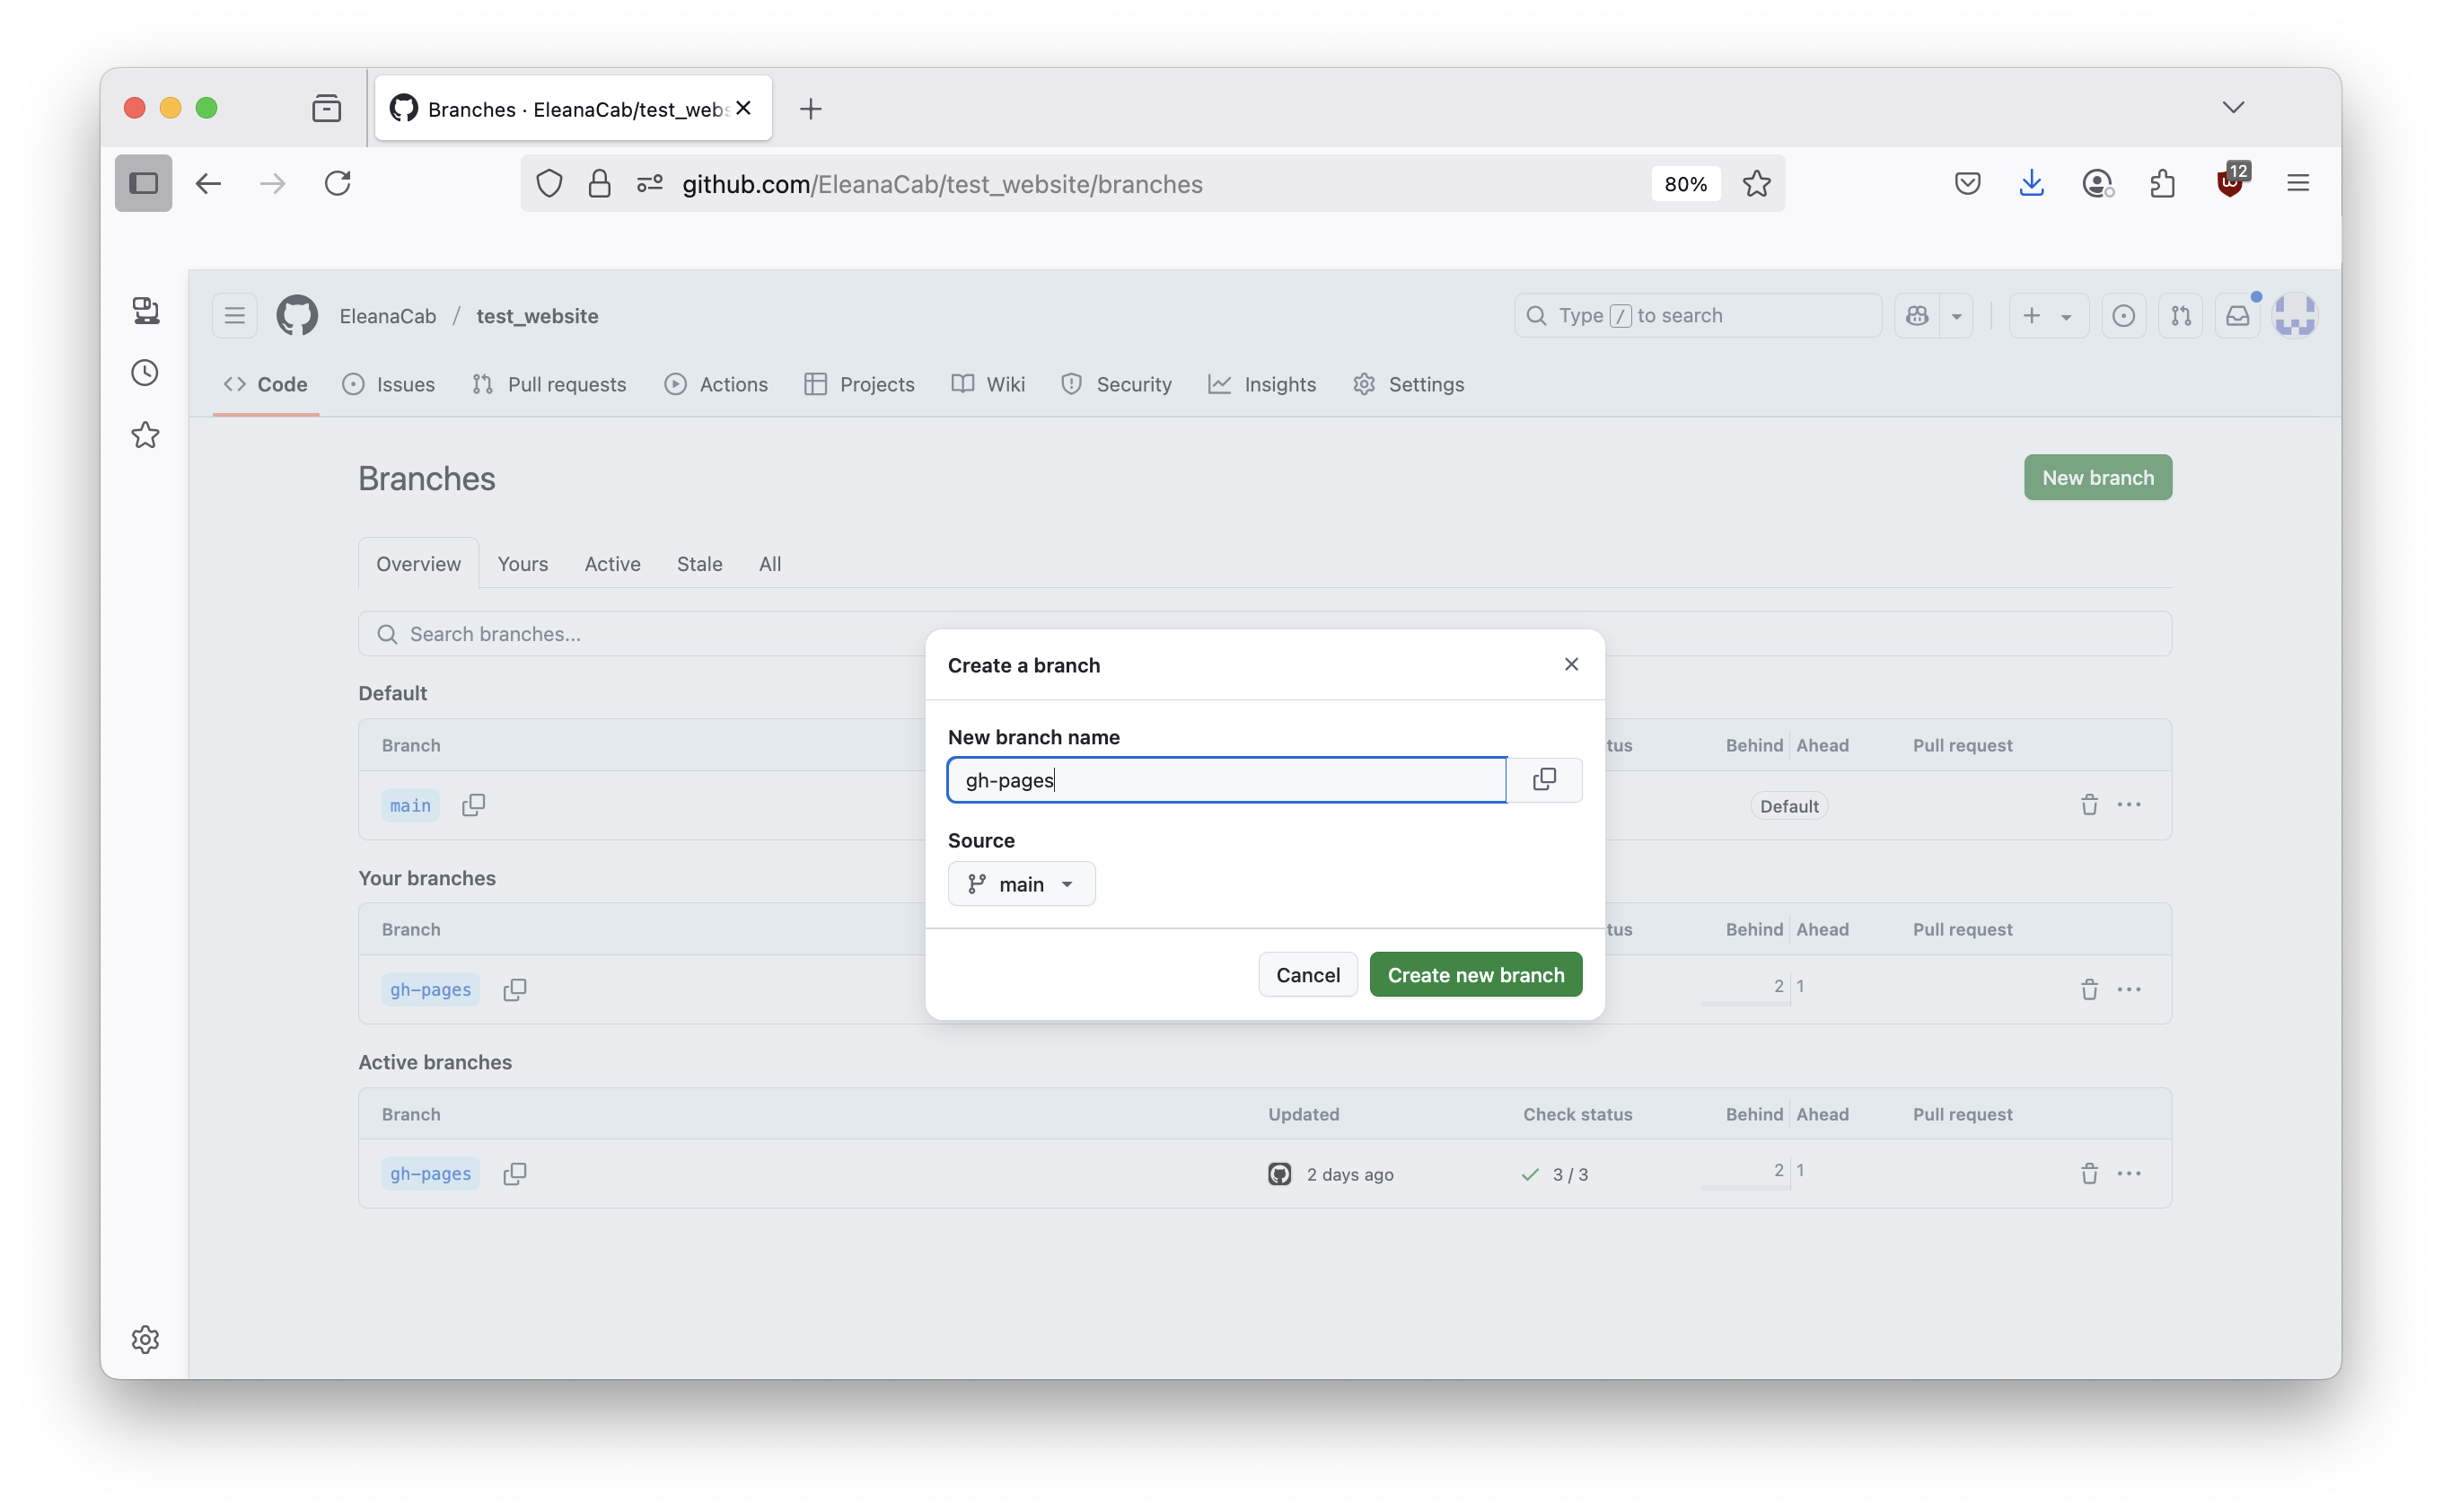
Make sure to name it gh-pages, it has to be named this in order for your website to work.
7 - Setting Up Github Pages and Workflows Locally
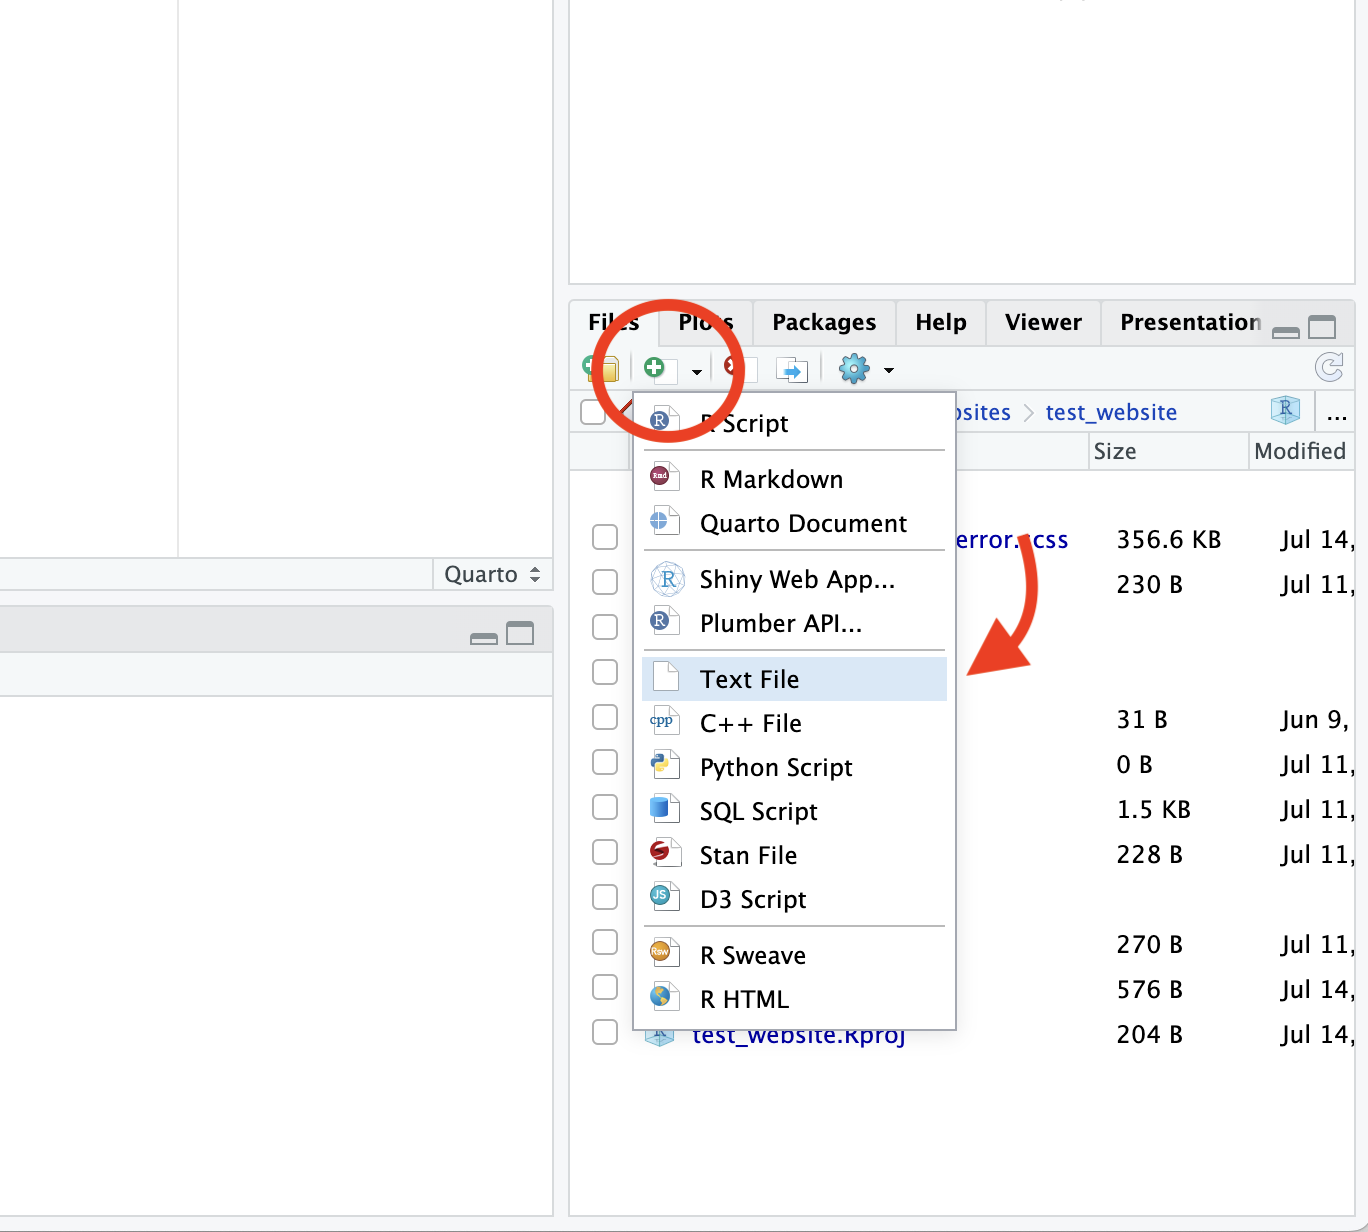
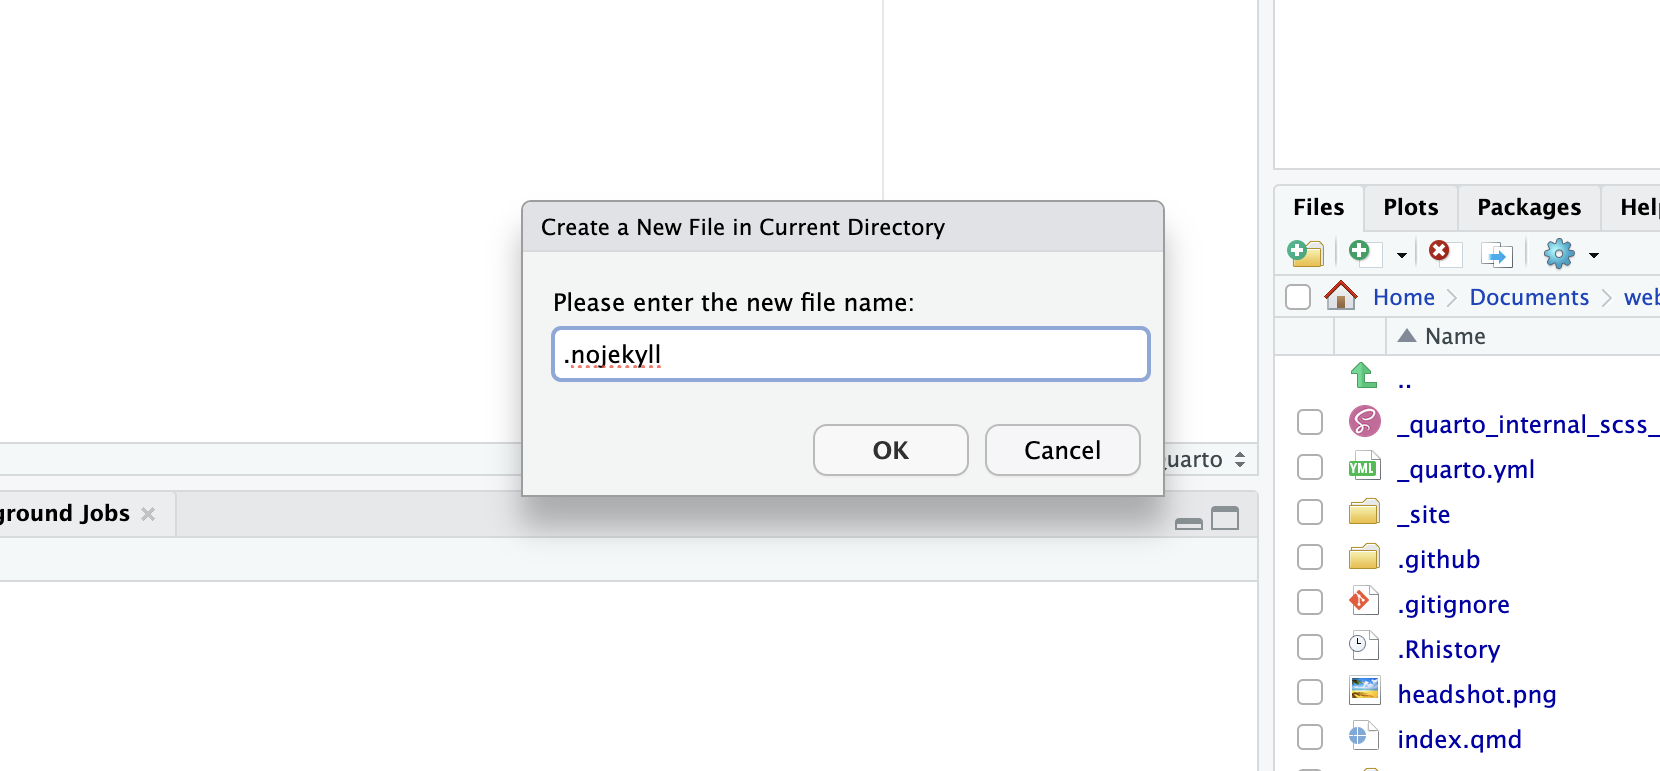
Back in R studio do the following:
- Create text file named
.nojekyll, it does not need to contain anything
Create
.githubfolder in your working directoryCreate a folder named
workflowsinside the.githubfolderCreate a text file named
publish.ymlinside the folder.github/workflowsCopy and paste below into the
publish.yml:
publish.yml
on:
  workflow_dispatch:
  push:
    branches: main

name: Quarto Publish

jobs:
  build-deploy:
    runs-on: ubuntu-latest
    permissions:
      contents: write
    steps:
      - name: Check out repository
        uses: actions/checkout@v4

      - name: Set up Quarto
        uses: quarto-dev/quarto-actions/setup@v2

      - name: Render and Publish
        uses: quarto-dev/quarto-actions/publish@v2
        with:
          target: gh-pages
        env:
GITHUB_TOKEN: ${{ secrets.GITHUB_TOKEN }}9 - Check Settings and Website
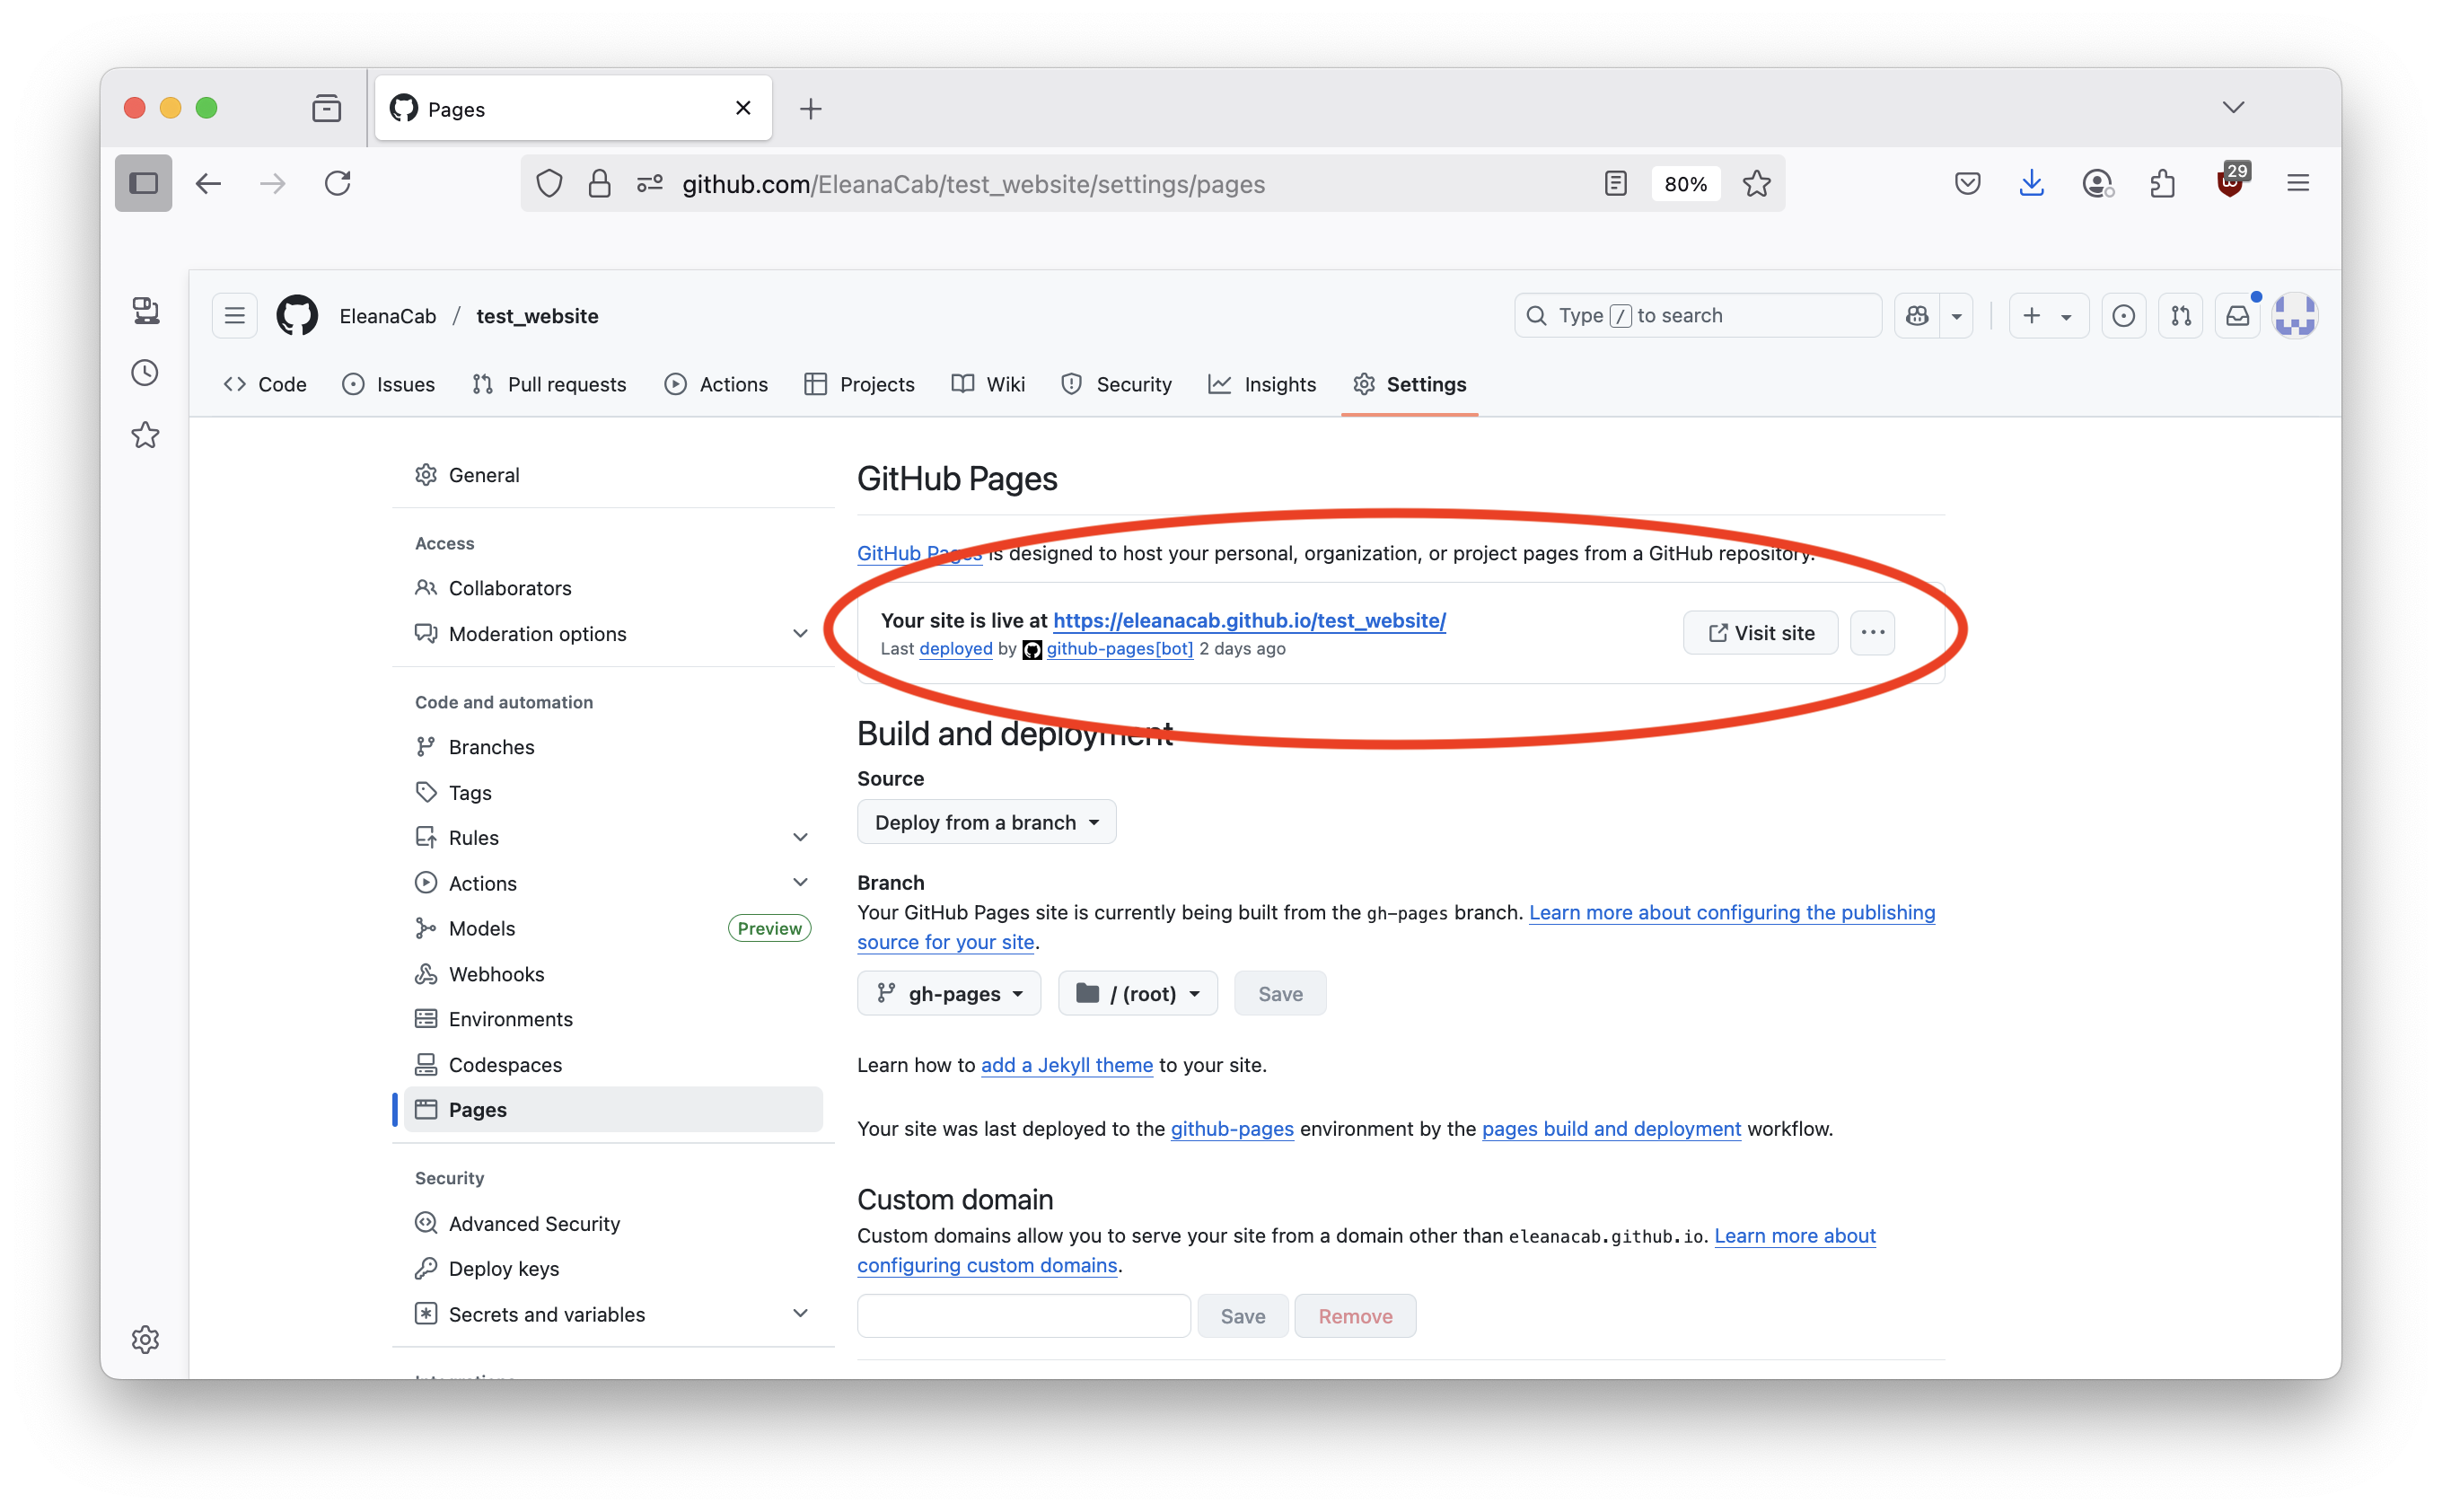
Navigate to settings of your repository.
Then navigate to pages.

In pages make sure that under Build and Deployment Source is Deploy from Branch. Also make sure that under Branch that gh-pages is selected from /(root) like below:

10 - Visit Your Website!